






LINE Basics Guide | How to Enable the Messaging API Directly from the LINE Official Account Manager
Struggling to set up the Messaging API for your LINE Official Account? Not sure how to sign up for LINE Developers? Does everything have to start there, or is there a faster, simpler way? You can actually enable the Messaging API straight from the LINE Official Account Manager (LINE OA Manager) you already know!
 Khan LeeCTO
Struggling to figure out how to set up the Messaging API for your LINE Official Account? Not sure how to sign up for LINE Developers? Does everything really have to start with LINE Developers, or is there a faster, simpler way?
In fact, you can enable the Messaging API directly from the platform businesses know best: the LINE Official Account Manager (LINE OA Manager)! This tutorial shows you the quickest, simplest way to skip LINE Developers and enable the Messaging API right from the LINE Official Account Manager.
How to enable the Messaging API in the LINE Official Account Manager
You can enable the Messaging API directly in the LINE Official Account Manager web console.
- First, log in with your “LINE Business ID”.
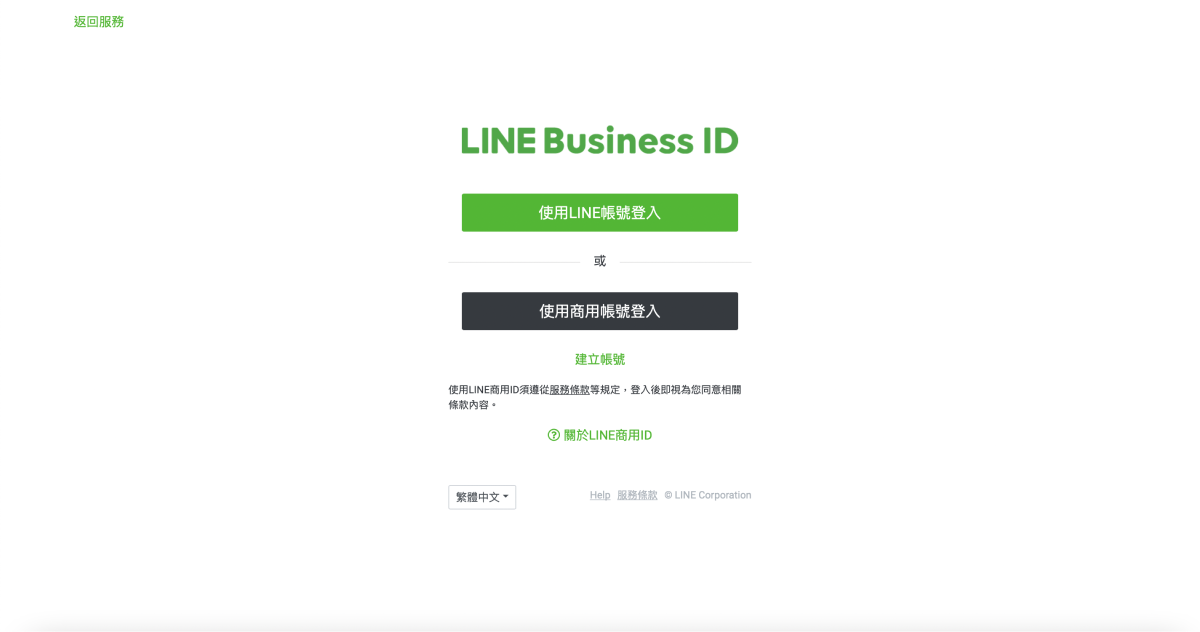
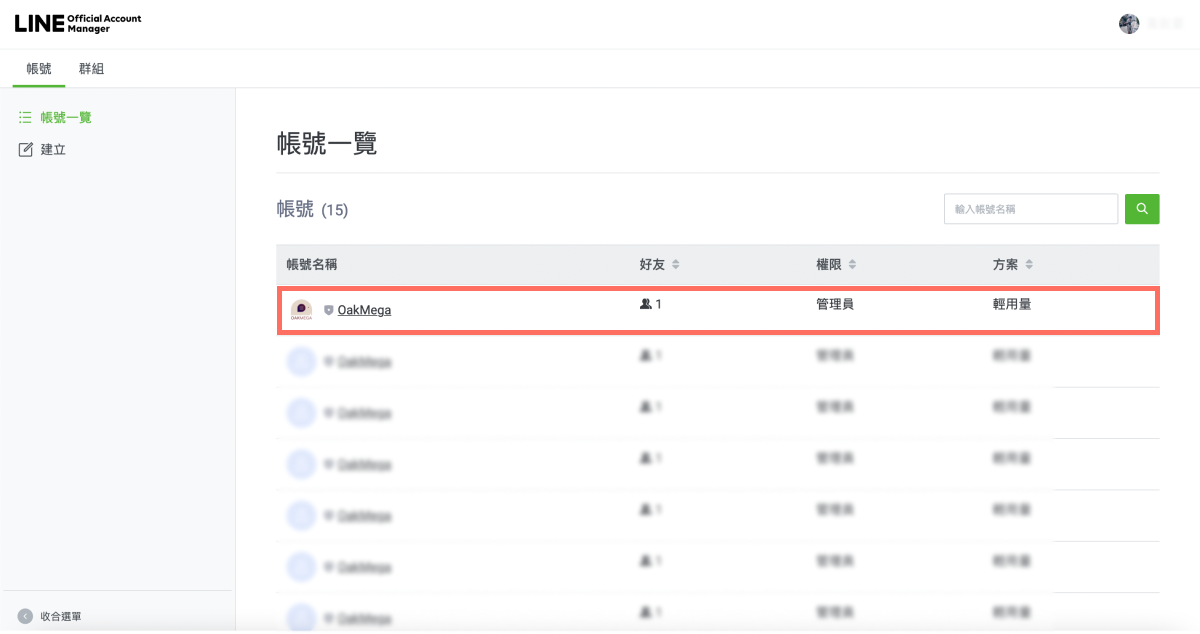
- Once you’re in, pick the LINE Official Account you want to enable the Messaging API for from the account list.
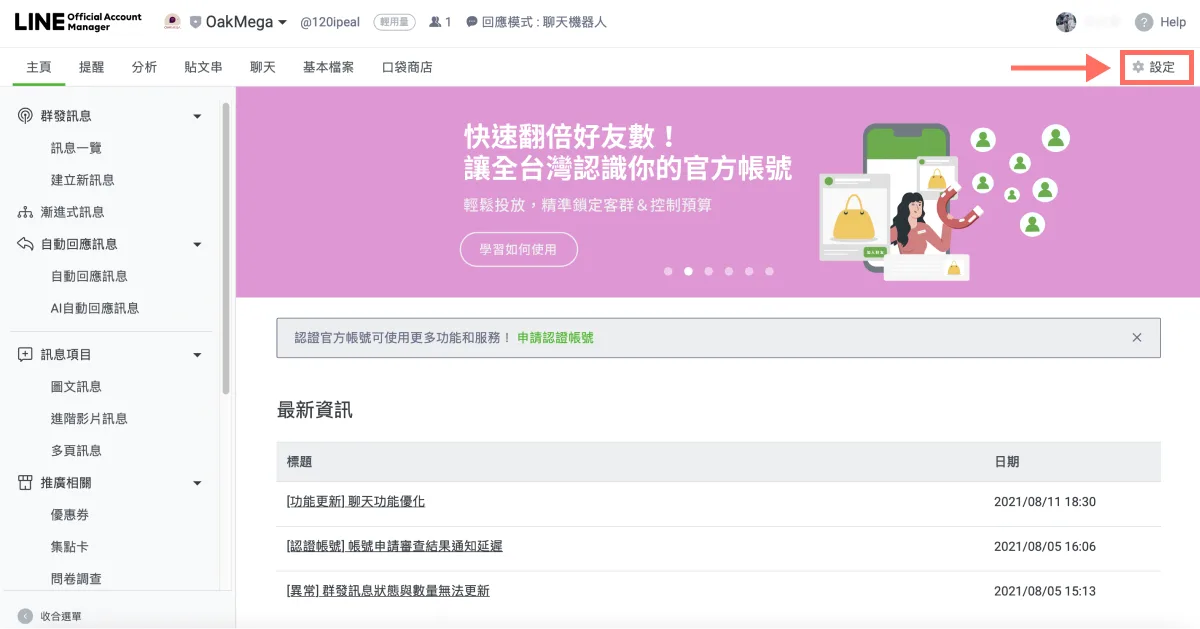
- In the LINE Official Account Manager, click “Settings” in the top-right corner.
- The Settings page opens on the billing section by default. Click “Messaging API” in the left-hand menu.
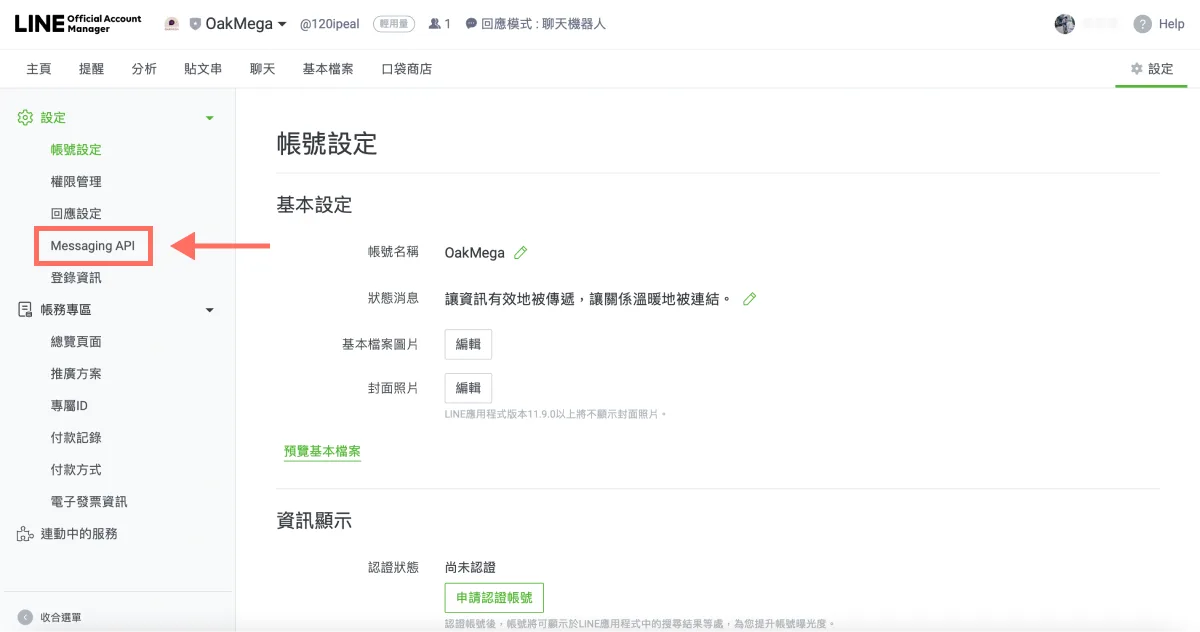
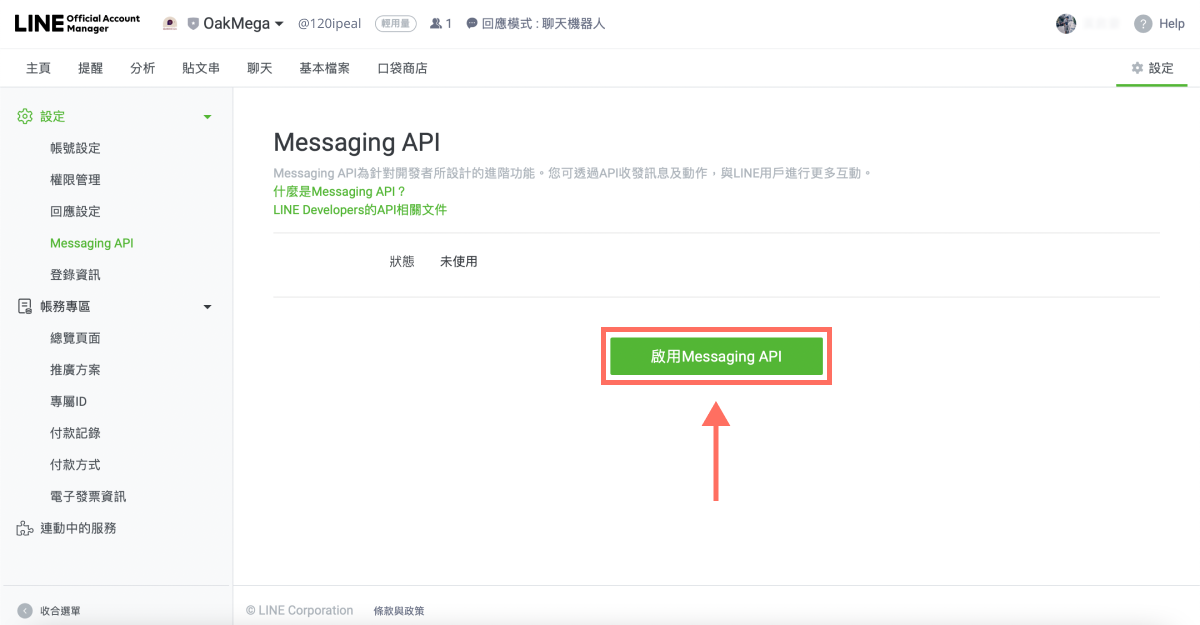
- On the Messaging API page, click “Enable Messaging API.”
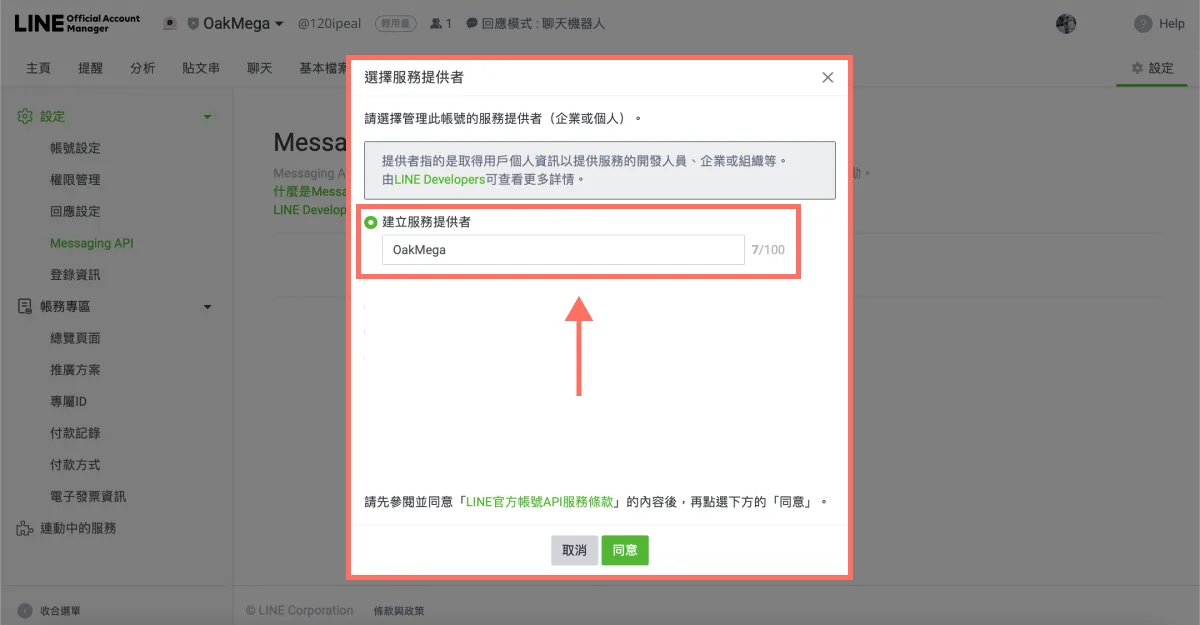
- Create a provider — simply enter your brand name (up to 100 characters).
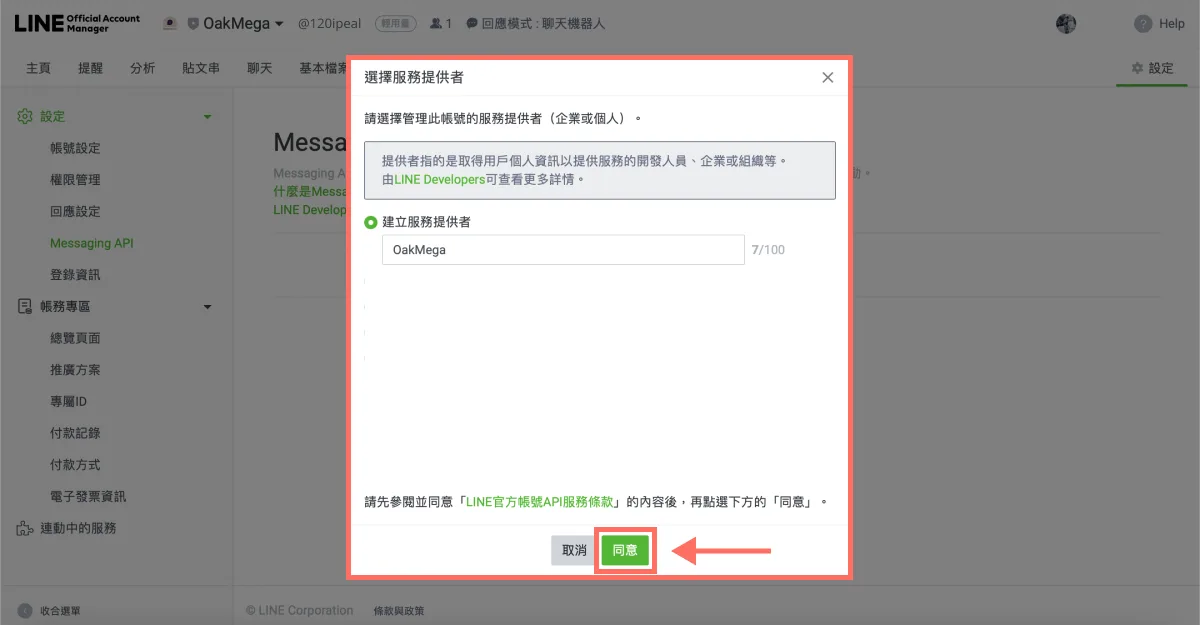
When you’re done, click “Agree.”
Next, enter the URLs of your company’s privacy policy and terms of use. These are optional (you can set them after enabling the Messaging API).
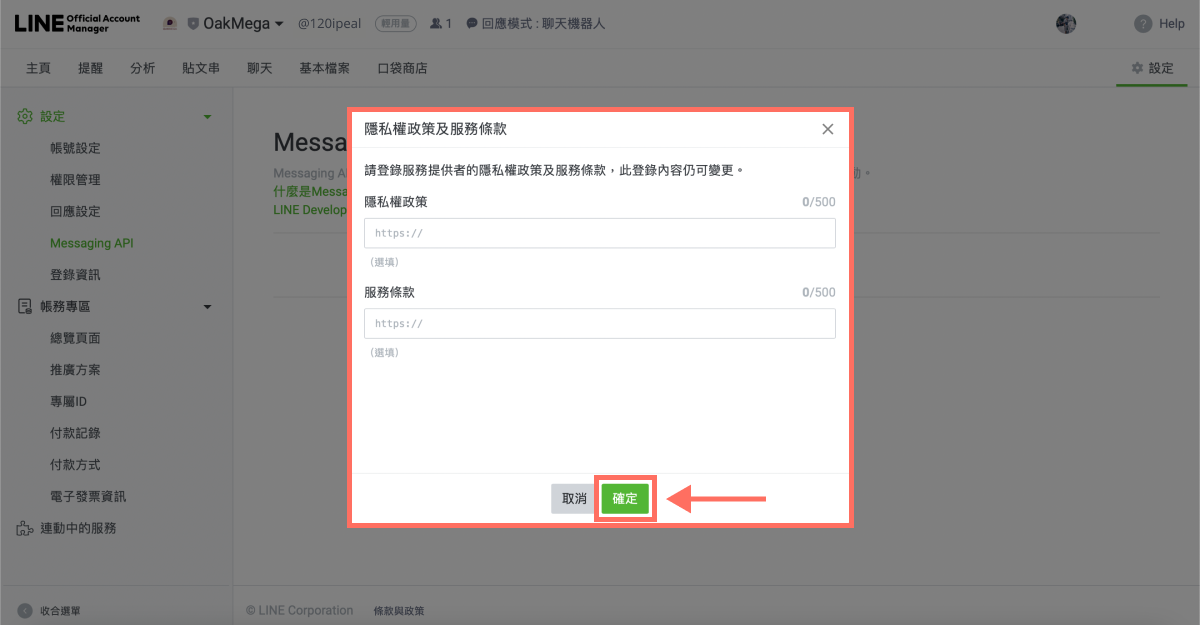
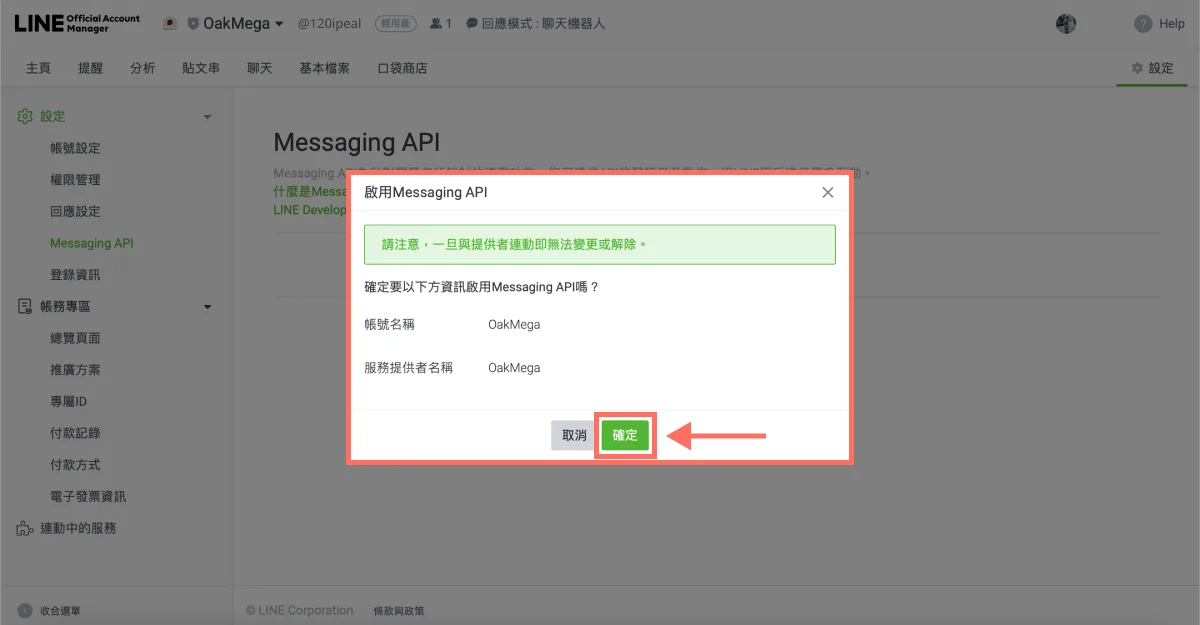
Finally, confirm. Note that once the Messaging API is enabled, it can’t be changed or disabled (short of deleting the account). Click “OK” to confirm.
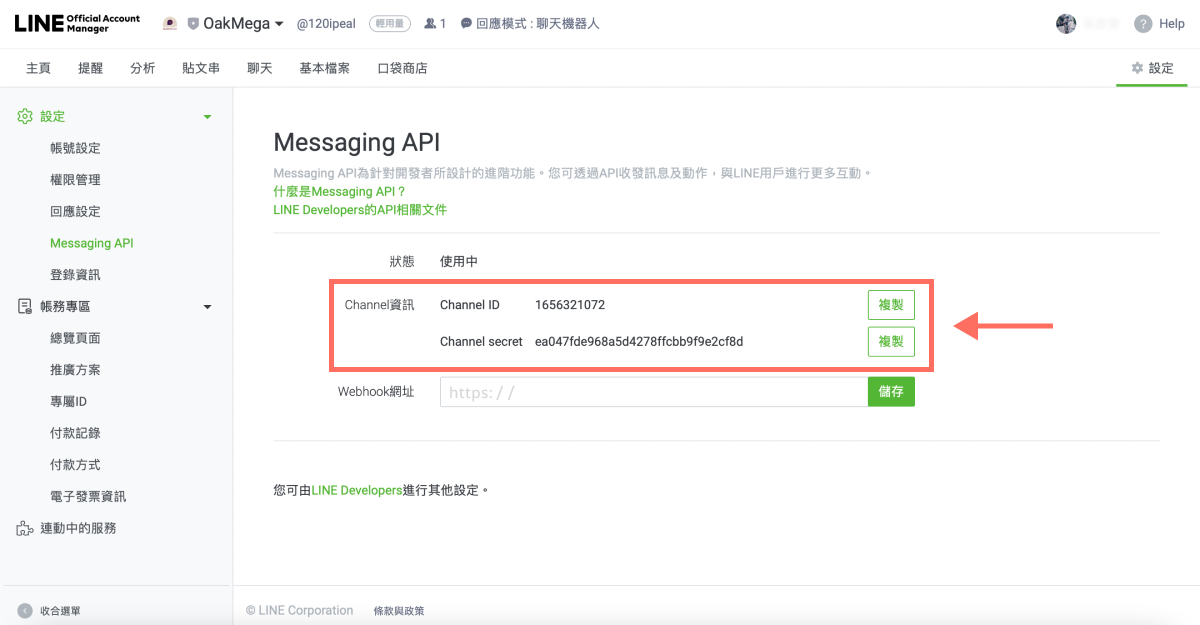
- You’ll be taken back to the Messaging API page, which now shows the connected Channel ID and Channel secret. That means you’re all set.
Why enable the Messaging API?
That’s it — your Messaging API is enabled. You might be wondering: “My LINE Official Account was doing just fine. Why spend time setting up this strange thing?”
The truth is, the Messaging API lets your LINE Official Account do much, much more. For example, by connecting the Messaging API to your own server or a third-party provider’s server, you can receive messages friends send on LINE and unlock more advanced uses like these:
- Integrate LINE friend data into your own member management system.
- Send segmented broadcasts based on data in your own member management system.
- Create event-exclusive photo frames and live polls for more varied interactions with friends.
- Set up collaborative customer service so multiple agents can handle friends’ inquiries on LINE together.
- Run automated marketing for every friend who adds your official account.
Want more tips on running LINE? Curious about other powerful Messaging API use cases? Head over to the OakMega LINE Official Account for more LINE marketing content, or follow our “OakMega LINE Marketing Toolkit,” which walks you through building your brand’s LINE Official Account from zero to one.