





Advanced LINE Guide | How to Set Up Your LINE Official Account Basics (Part 1)
Just opened a LINE Official Account and realized it still has no profile picture? Here’s how to upload your brand logo from the LINE admin console so friends know who you are — all through the LINE Official Account Manager web version.
 Howard HuangMarketing Specialist
Just opened a LINE Official Account and noticed it still has no profile picture? How do you upload your brand logo from the LINE admin console so your friends get to know you better? Don’t worry — follow the steps below and you can set up a profile picture for your brand in the LINE Official Account Manager web version!
How to configure basic settings in the LINE Official Account Manager
You can configure basic settings in the web version of LINE Official Account Manager — for example, adding a profile picture, changing the account name, or adding a status message:
Step by step: LINE Official Account Manager (web)
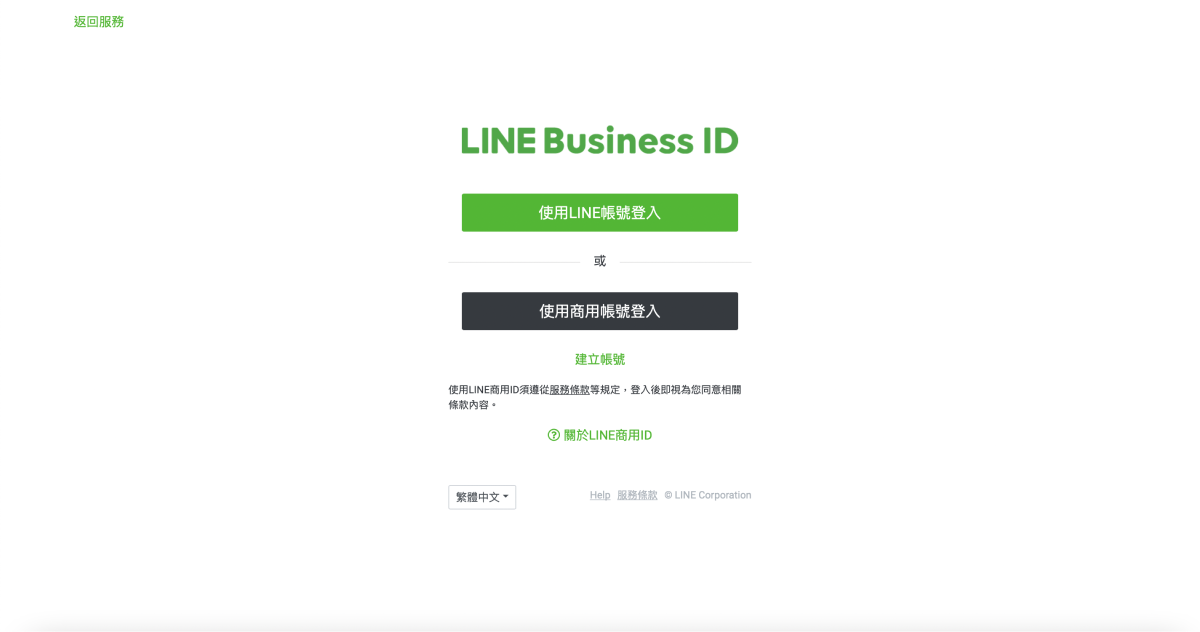
- First, log in with your “LINE Business ID”.
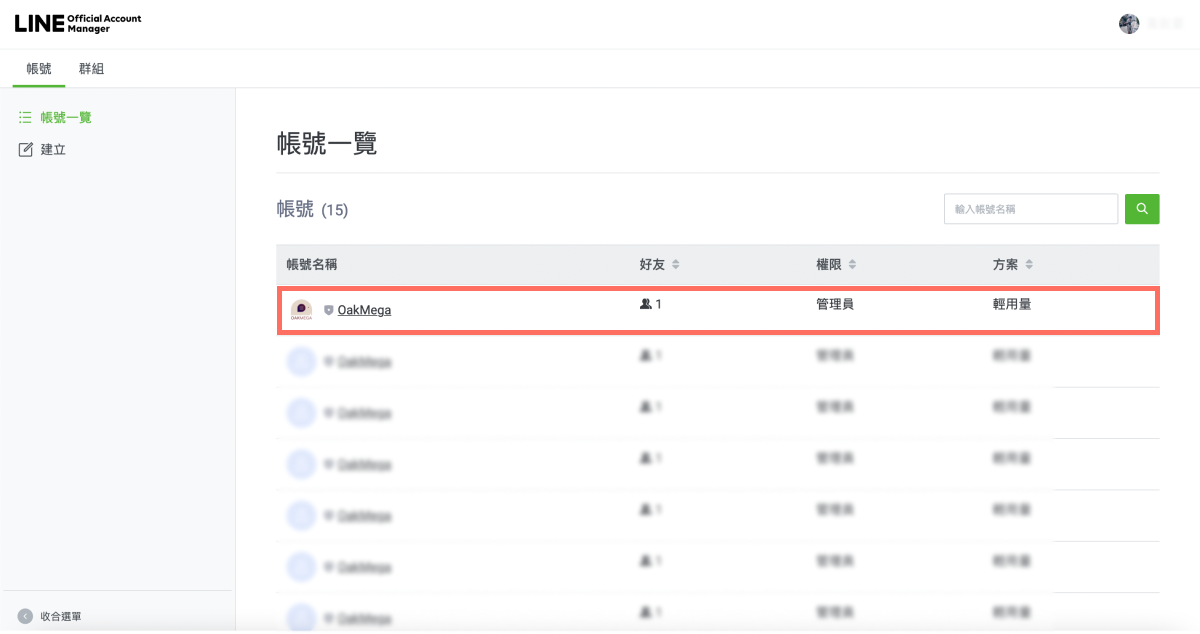
- Once you’re in, pick the LINE Official Account you want to configure from the account list.
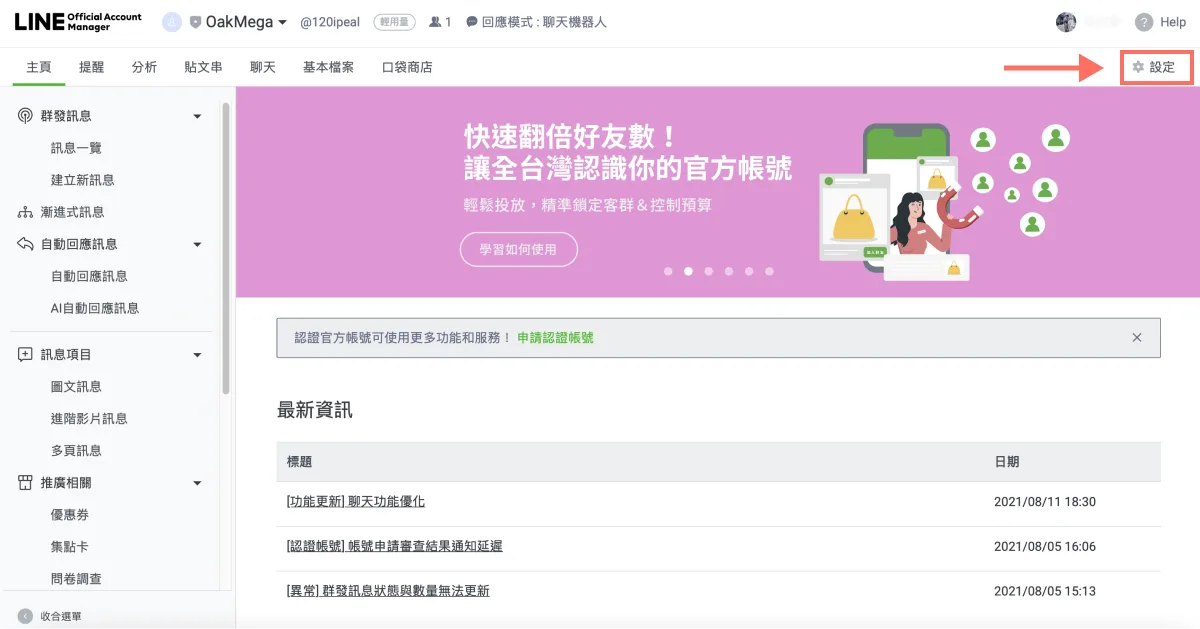
- Click “Settings” in the top-right corner.
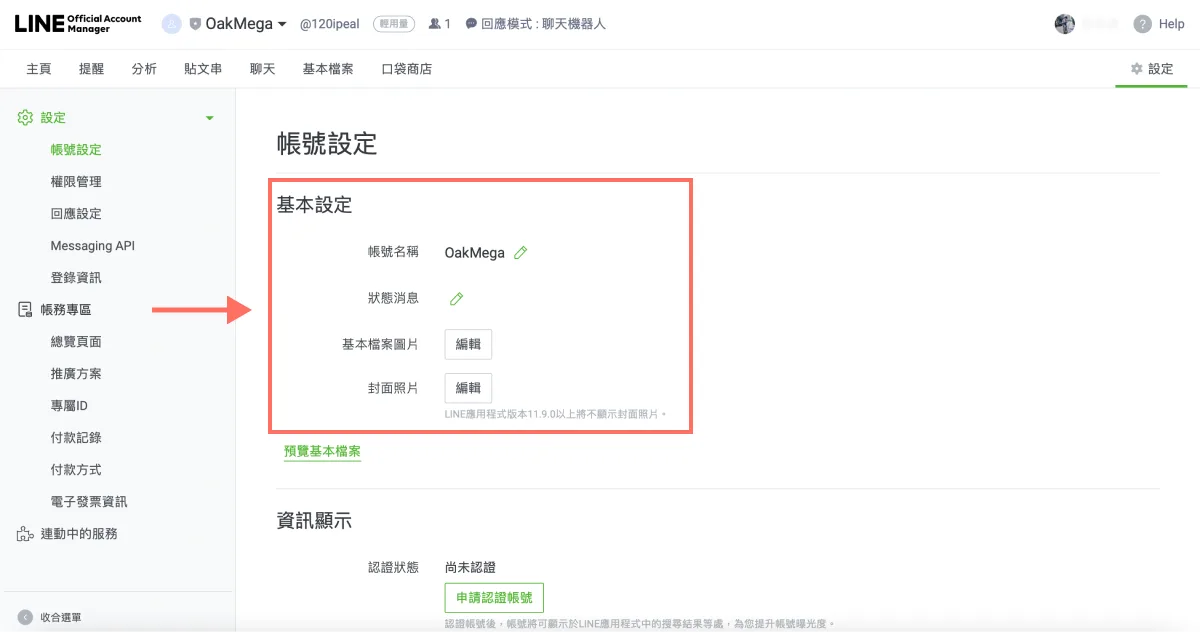
- On the Settings page, you’ll find the basic settings under “Account settings.” Start by clicking the pencil icon to change the account name.
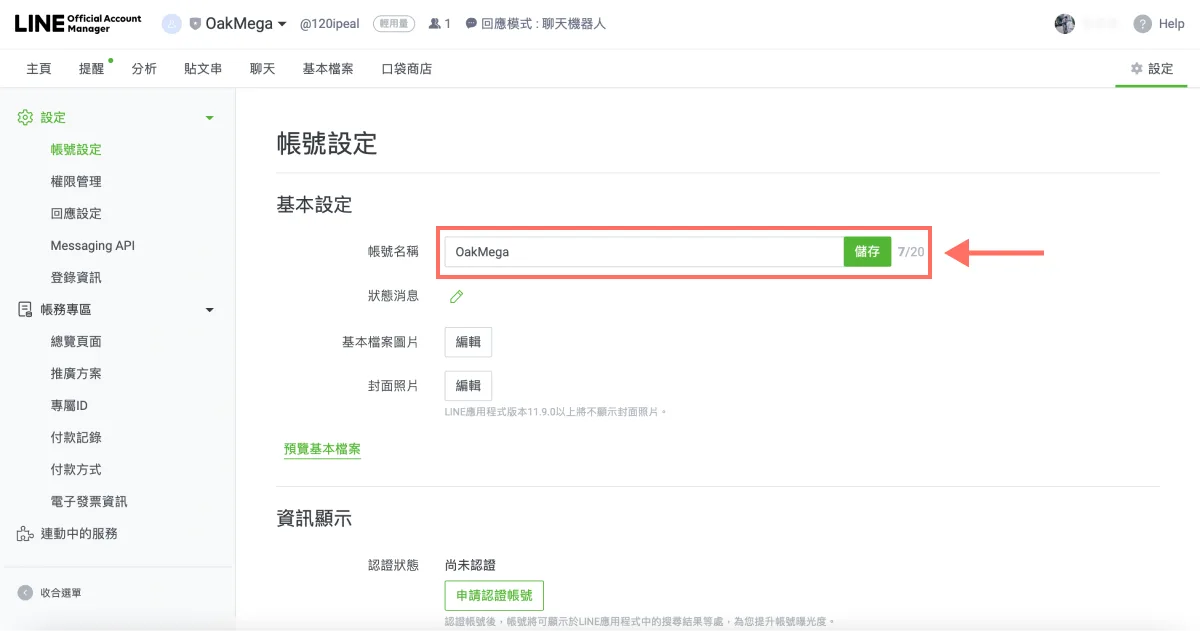
- Enter the new account name and click “Save.”
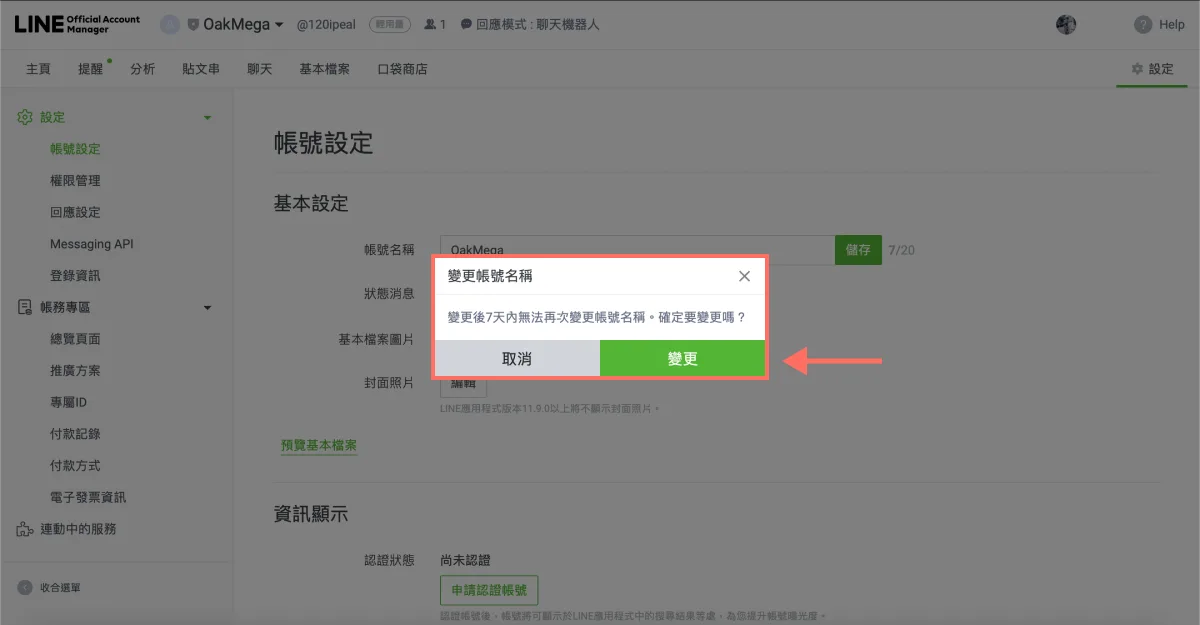
Note that the account name can only be changed once a week. Double-check it, then click “Change.”
- Next, add a status message, which appears below the account name. Click the pencil icon, enter your status message, and click “Save.”
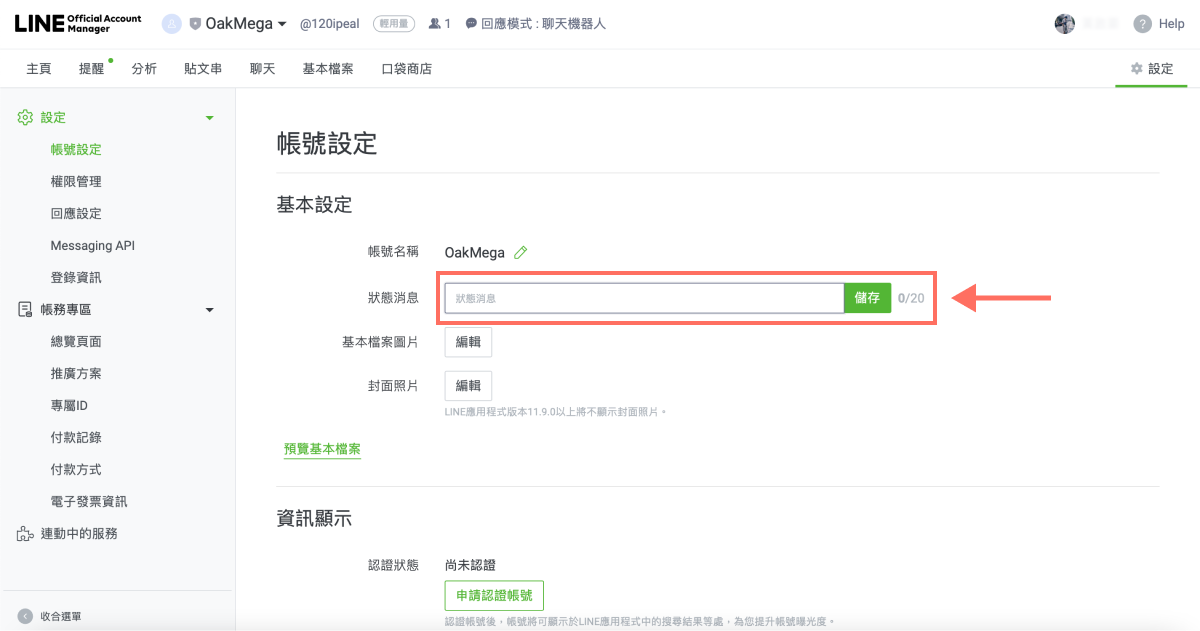
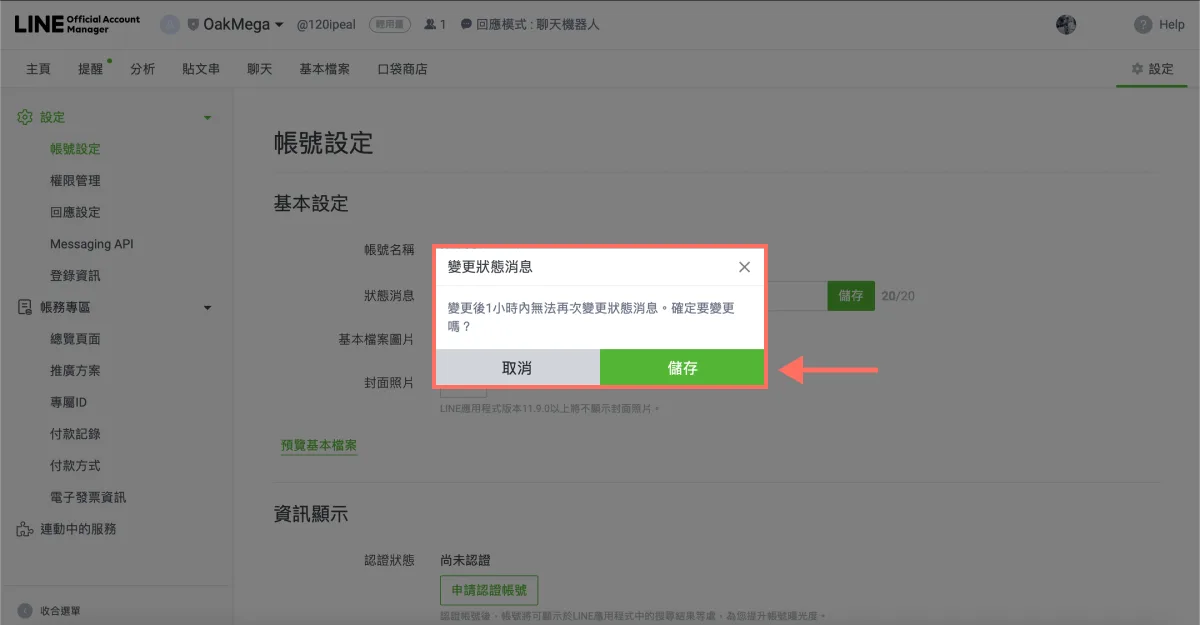
The status message can be updated once an hour. Check it over, then click “Save.”
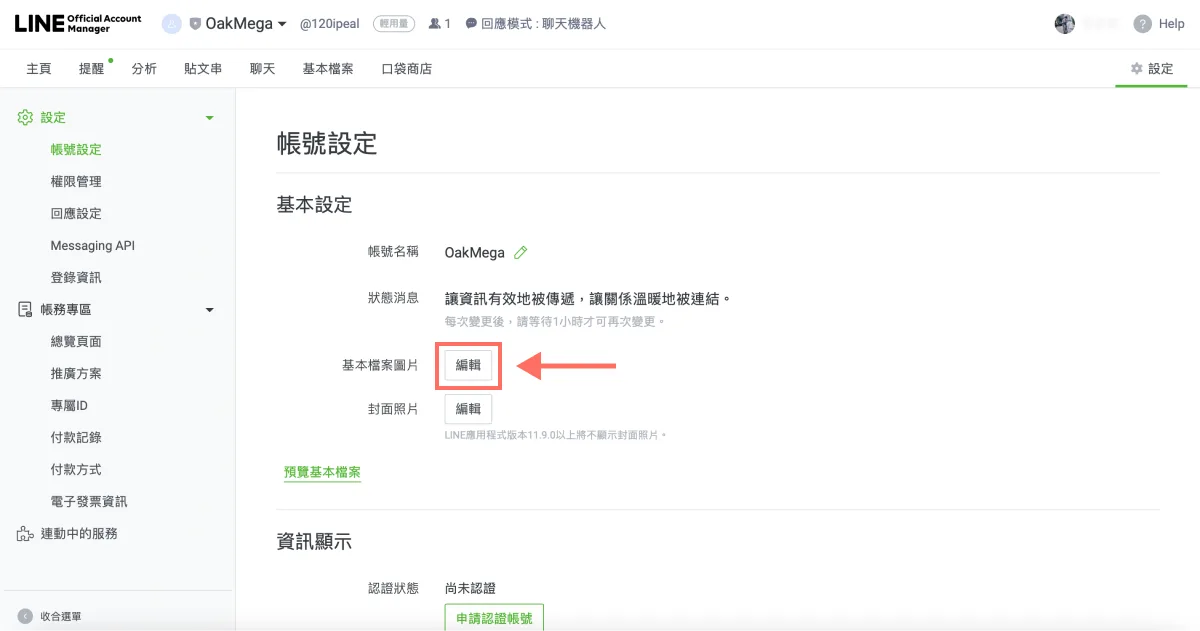
- Then click “Edit” to add a profile image — your official account’s profile picture.
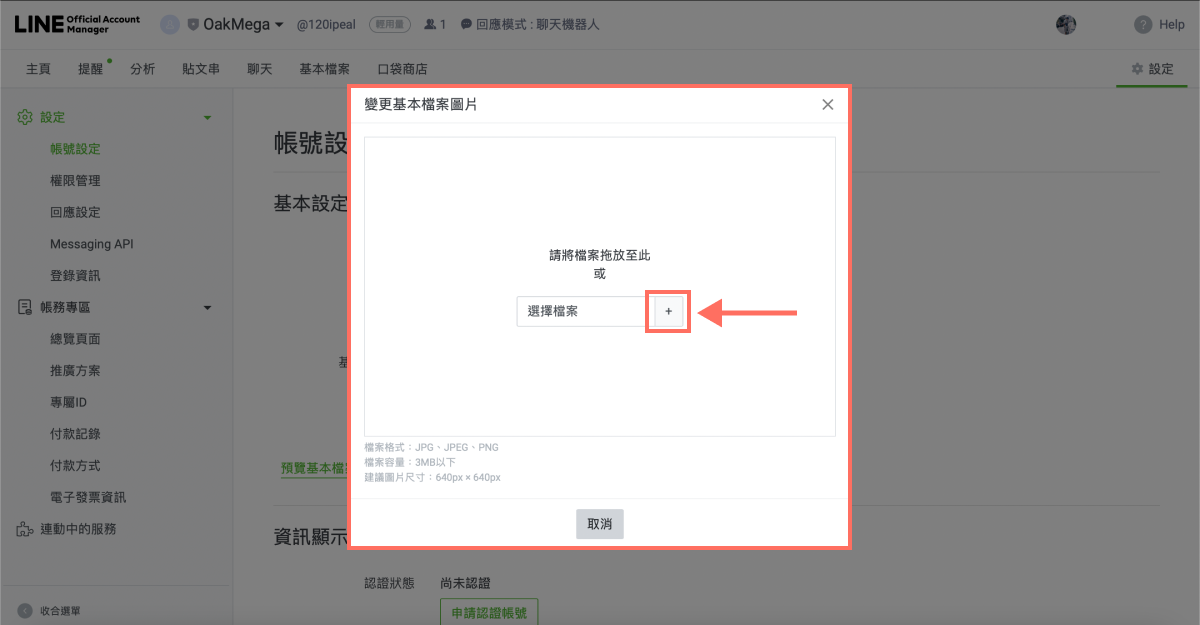
Drag and drop your file, or click “+” to choose one from your device. Keep three things in mind:
- Only JPG, JPEG, or PNG files are supported.
- The file must be 3 MB or smaller.
- Aim for 640 px × 640 px so your image doesn’t get cropped during setup.
After the upload, you can adjust which part of the image is shown. The profile image can be updated once an hour; when you’re done adjusting, click “Save” to upload it.
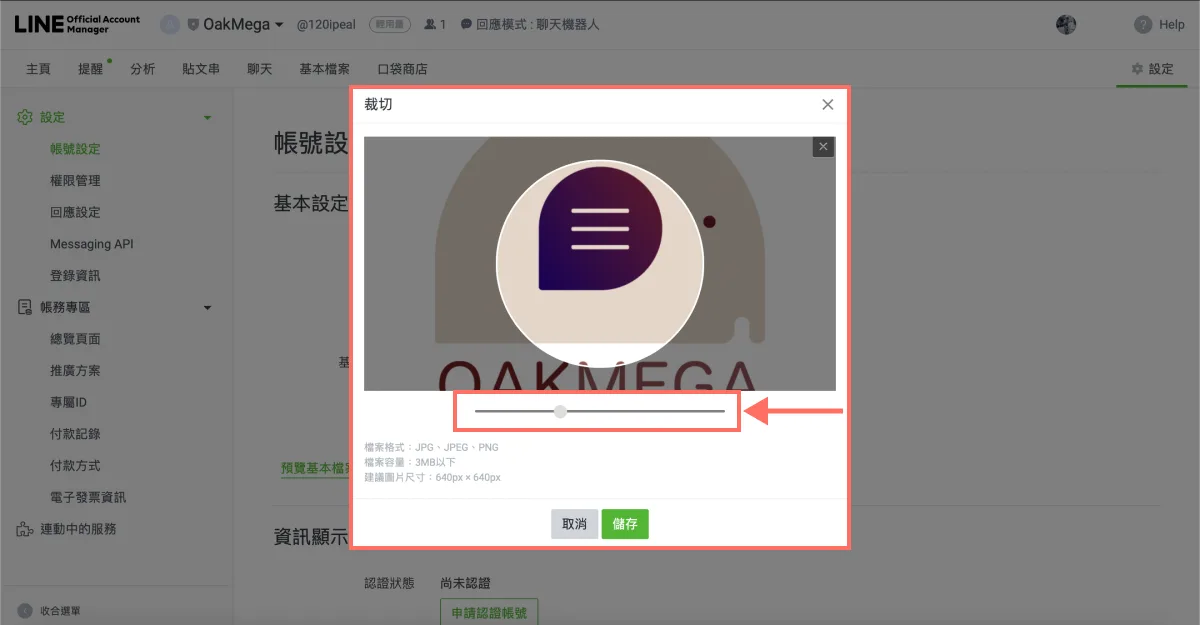
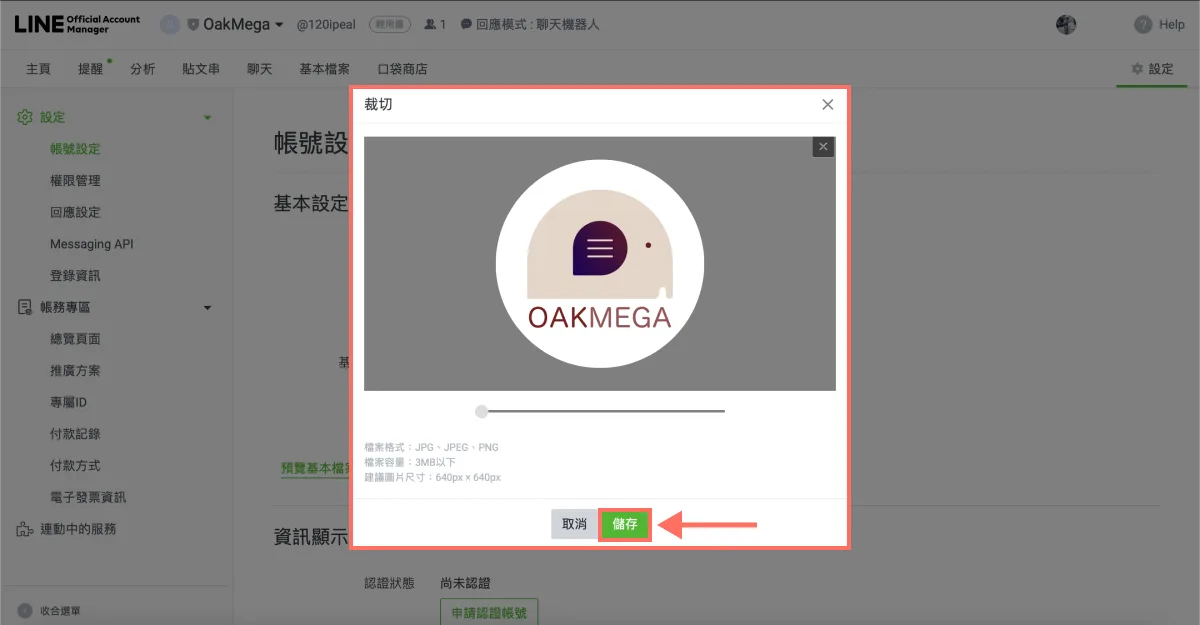
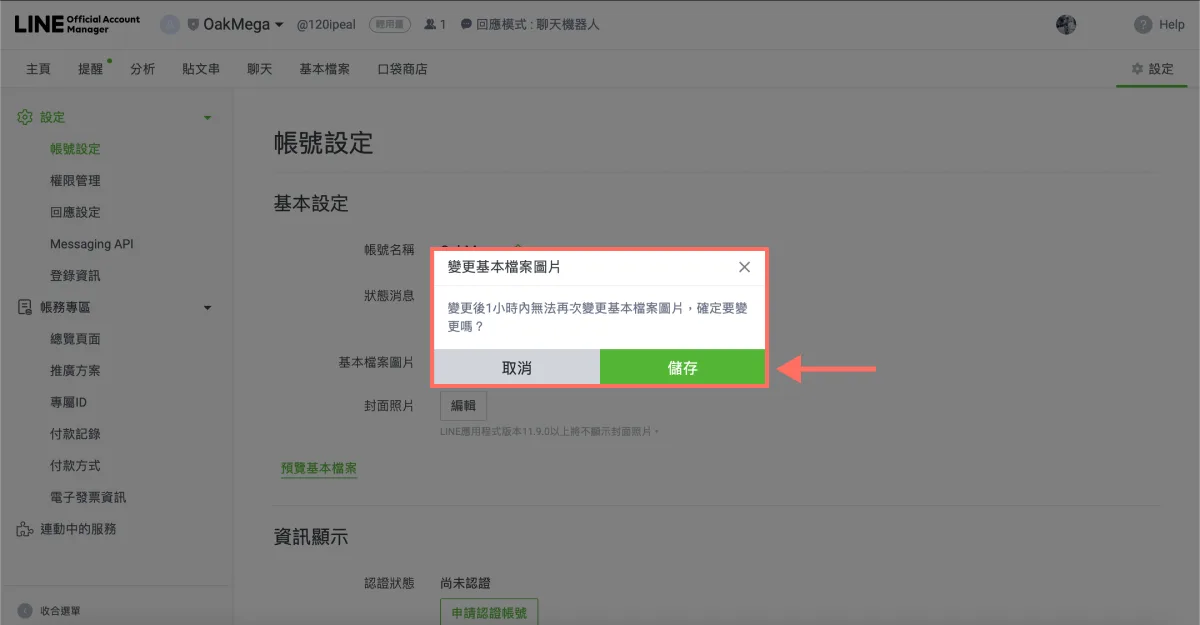
- Once the image is uploaded and the page refreshes, your new profile picture appears in the top-left corner. As for the cover photo, the current version of LINE no longer shows it to friends, so there’s no need to update it.
Click “Preview profile” and your browser opens a new window where you can review all your updated basic settings: account name, status message, and profile image (profile picture).
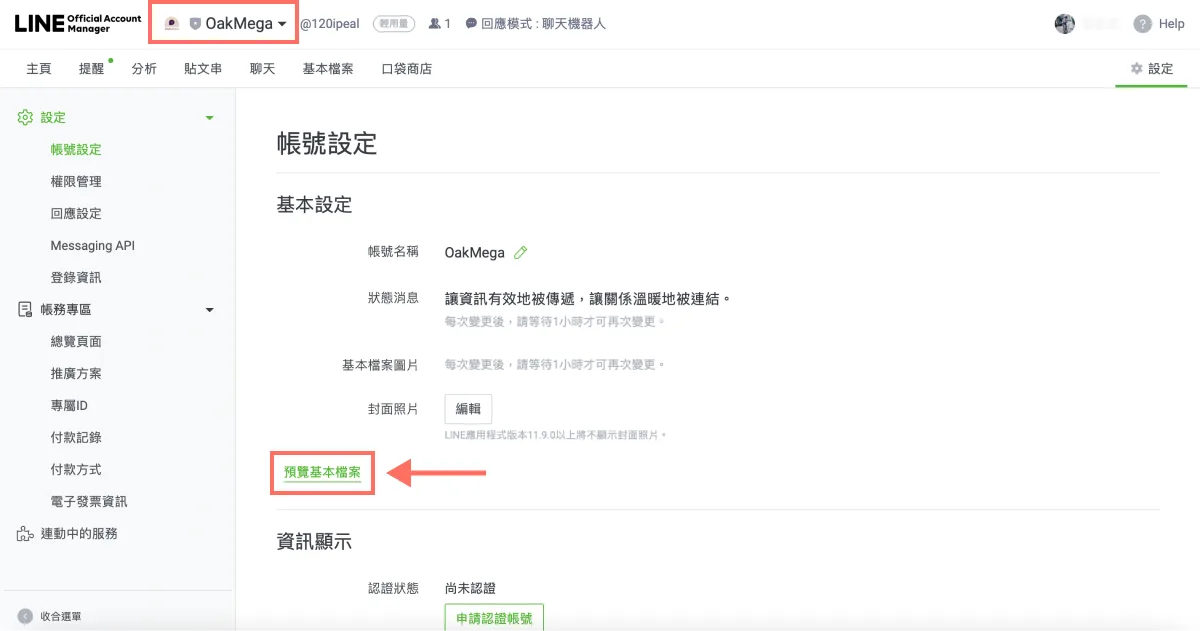
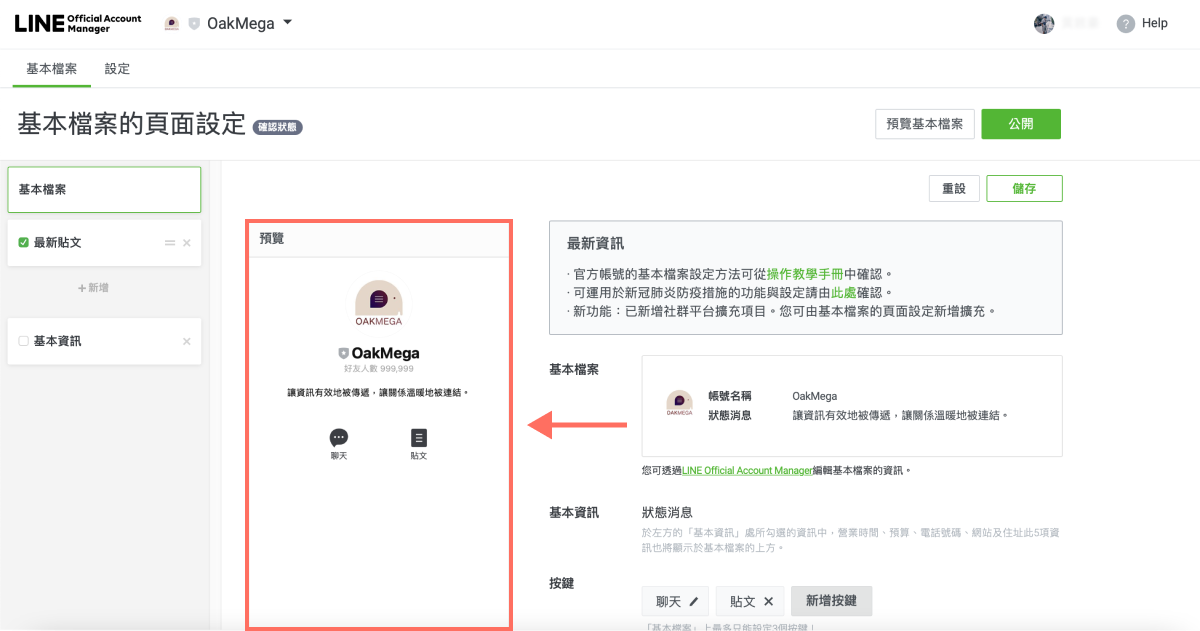
That’s it — setting up the basics of a LINE Official Account is pretty simple, right? Want more tips on running LINE? Can you customize the profile page further? Can you keep only the “Chat” button? Head over to the OakMega LINE Official Account for more LINE marketing content, or follow our “OakMega LINE Marketing Toolkit,” which walks you through building your brand’s LINE Official Account from zero to one.