






Advanced LINE Guide | How to Manage Permissions and Add Account Members
How do you set up permissions in LINE Official Account Manager and add administrators or operators to your account? Don't worry: with the steps below, you can configure LINE permissions right away in the LINE Official Account Manager web console.
 Howard HuangMarketing Specialist

How do you set up permissions in LINE Official Account Manager and add administrators or operators to your LINE Official Account? Don't worry. Follow the steps below and you can configure LINE permissions right away in the LINE Official Account Manager web console!
Steps in the LINE Official Account Manager Web Console
- First, log in with your “LINE Business ID”.
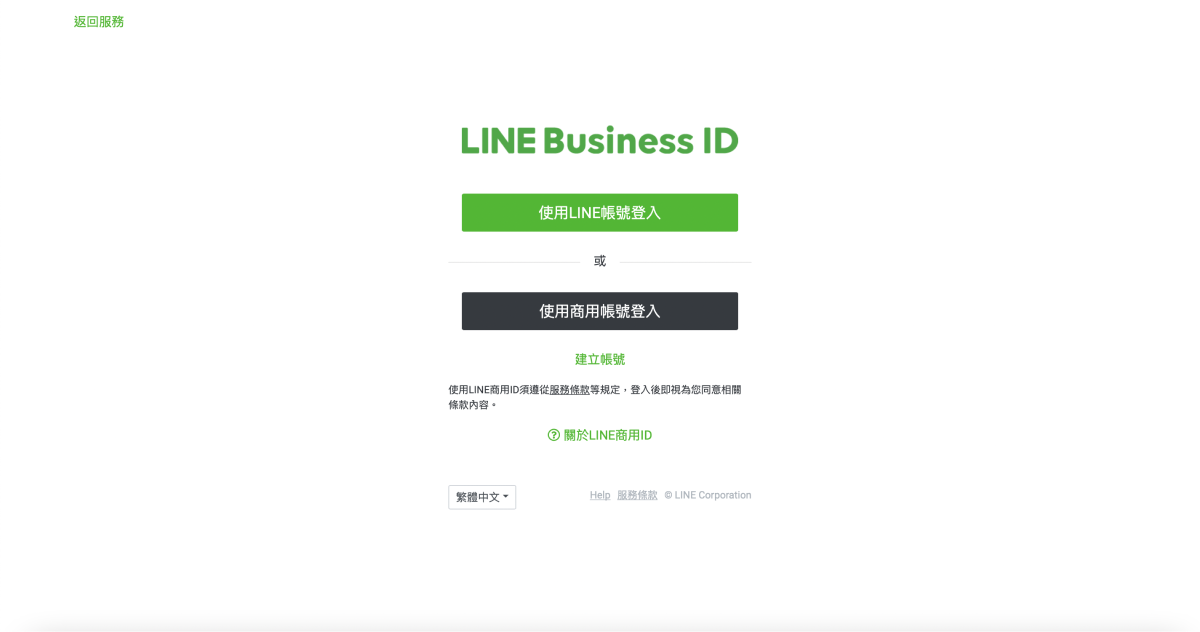
- After logging in, select the LINE Official Account you want to set permissions for from the account list.
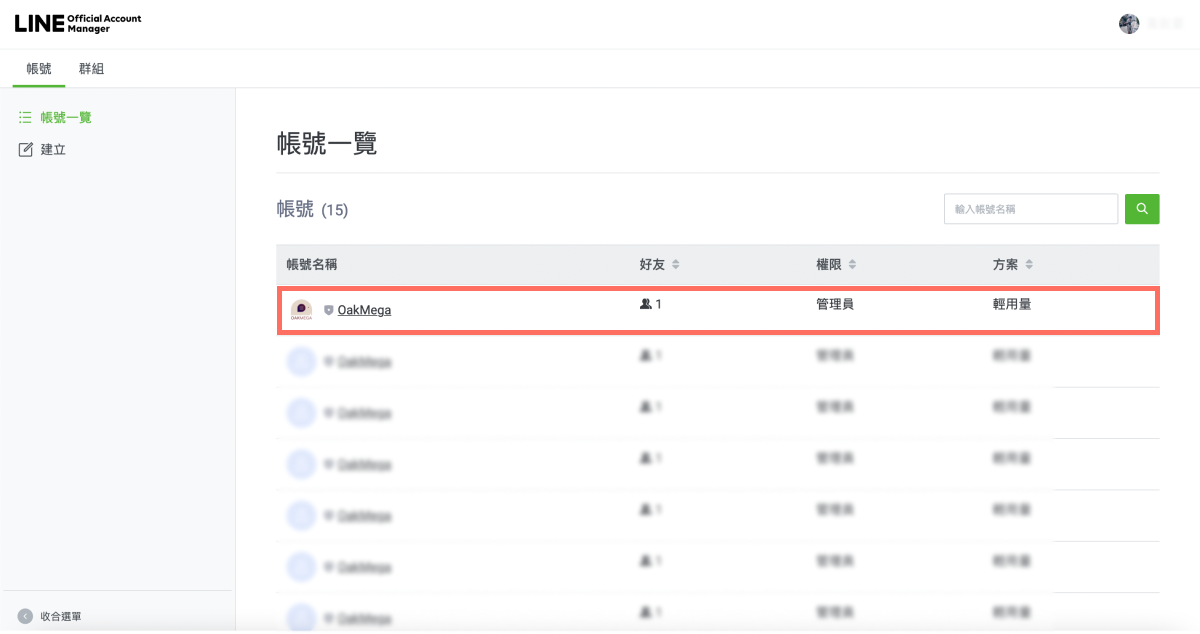
- Click “Settings” in the top-right corner.
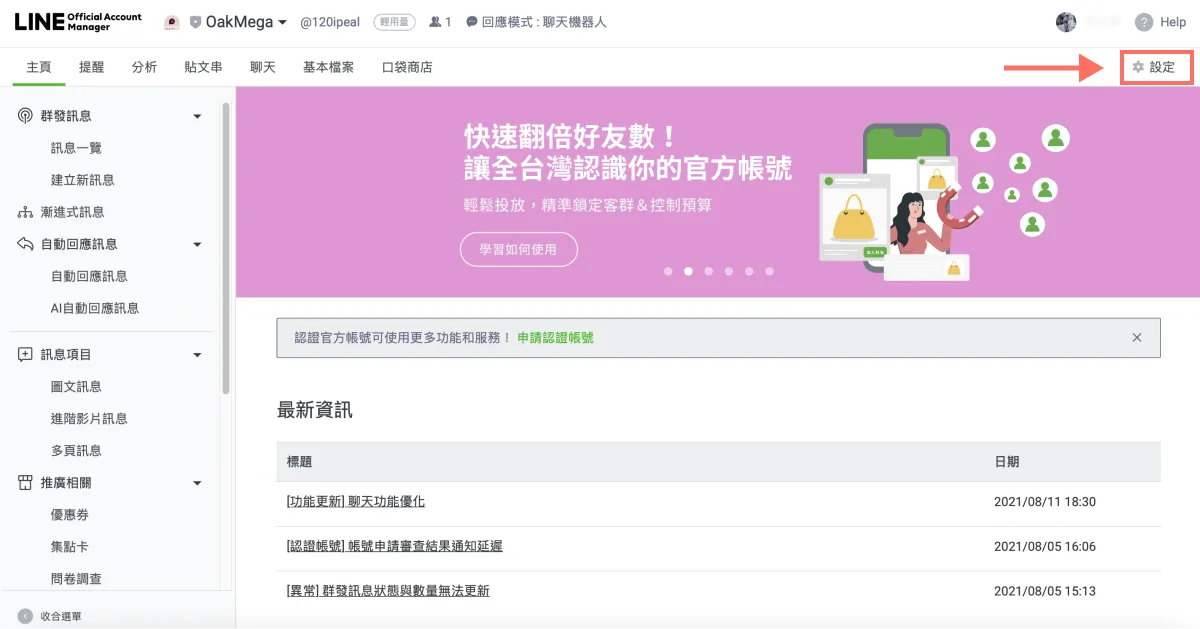
- Click “Permissions” in the left sidebar.
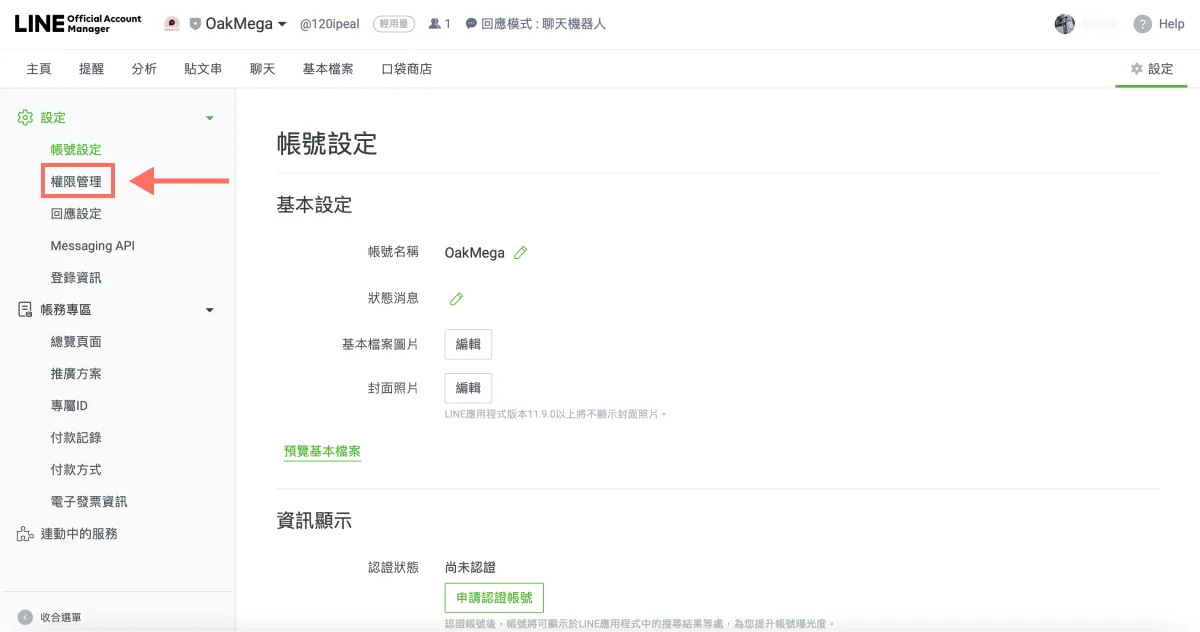
- On the Permissions page, click “Add member” on the right to set up permissions.
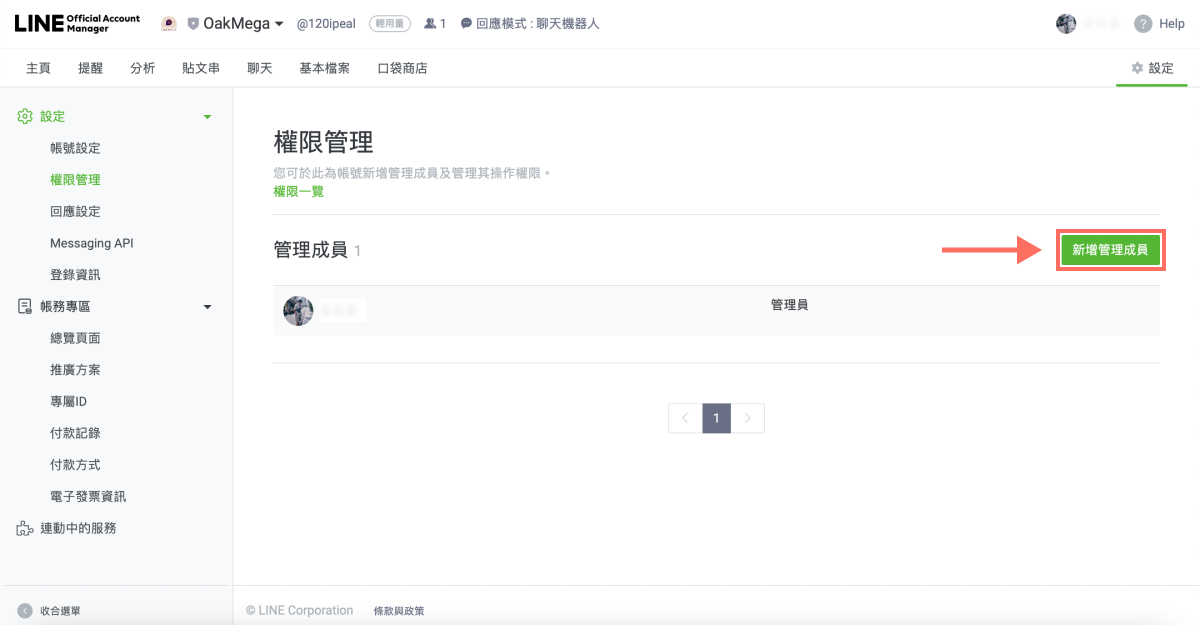
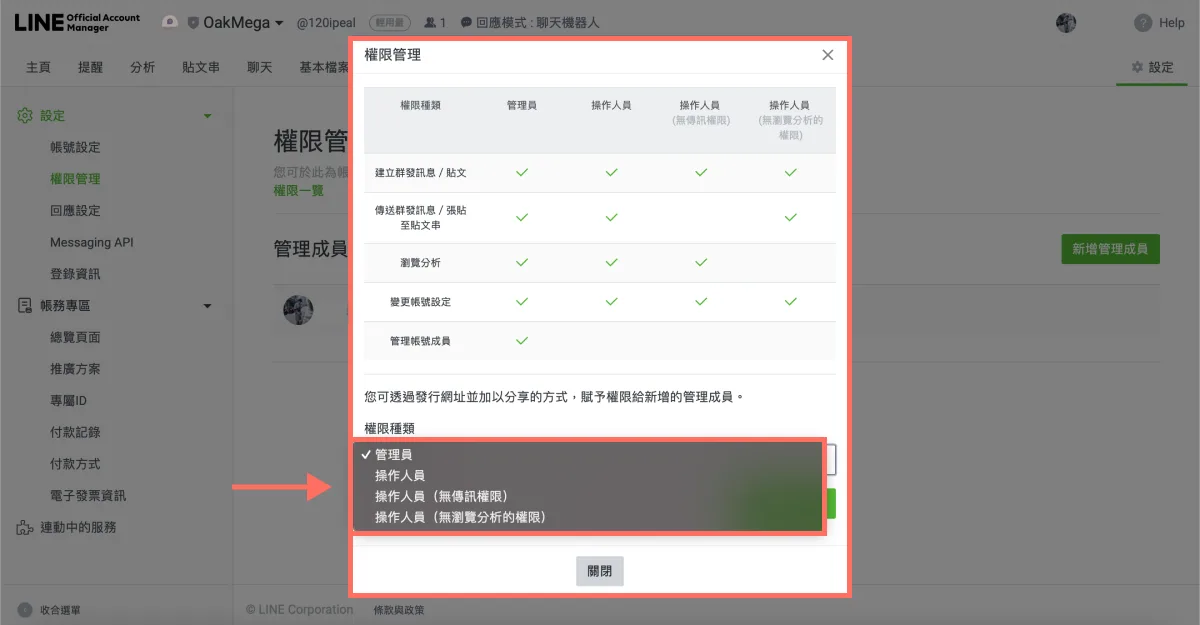
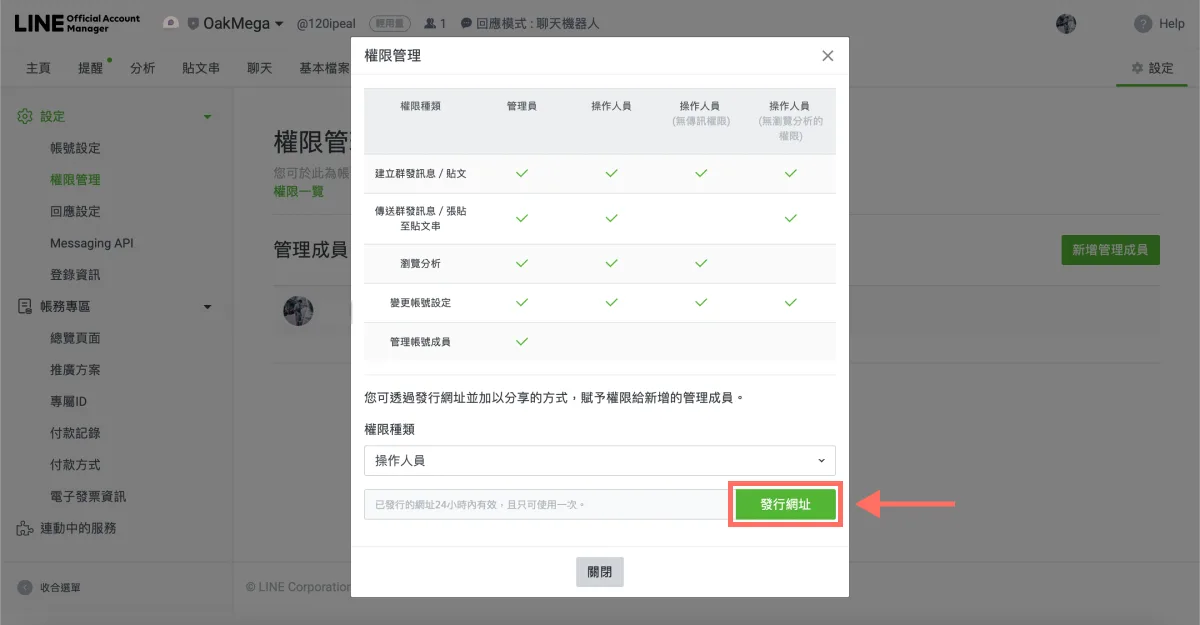
- A window appears with four permission levels, from most to least access:
- Admin
- Operator
- Operator (no sending)
- Operator (no access to statistics)
Note that only Admins can manage account members, so new members are usually invited as Operators.
Open the permission dropdown and choose the role for the person you're inviting.
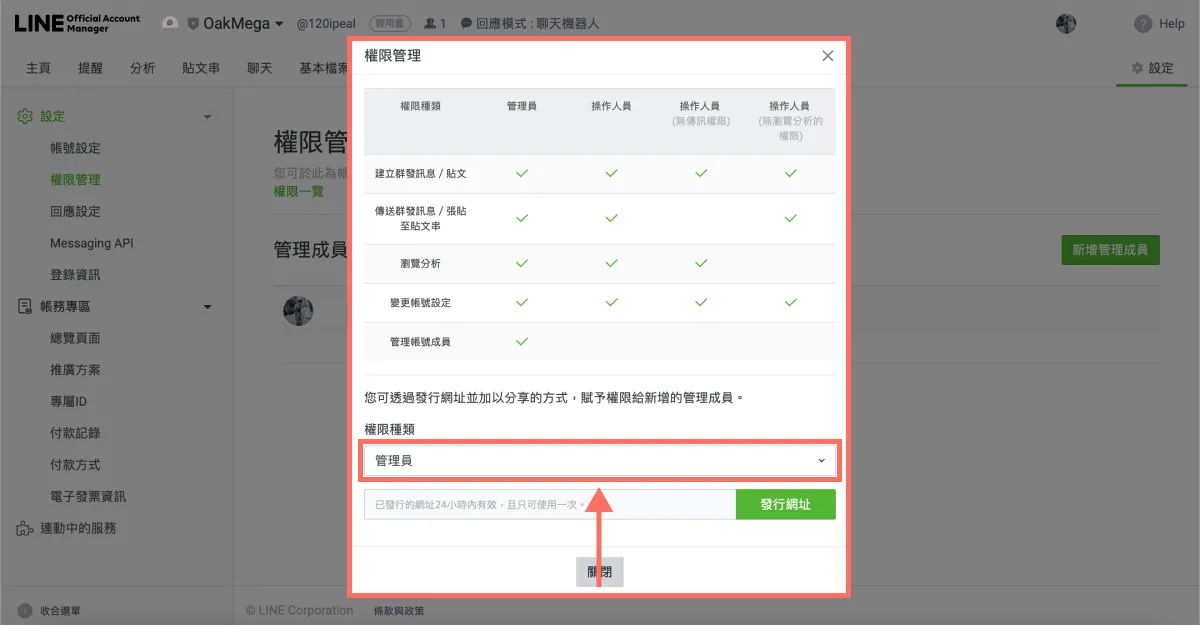
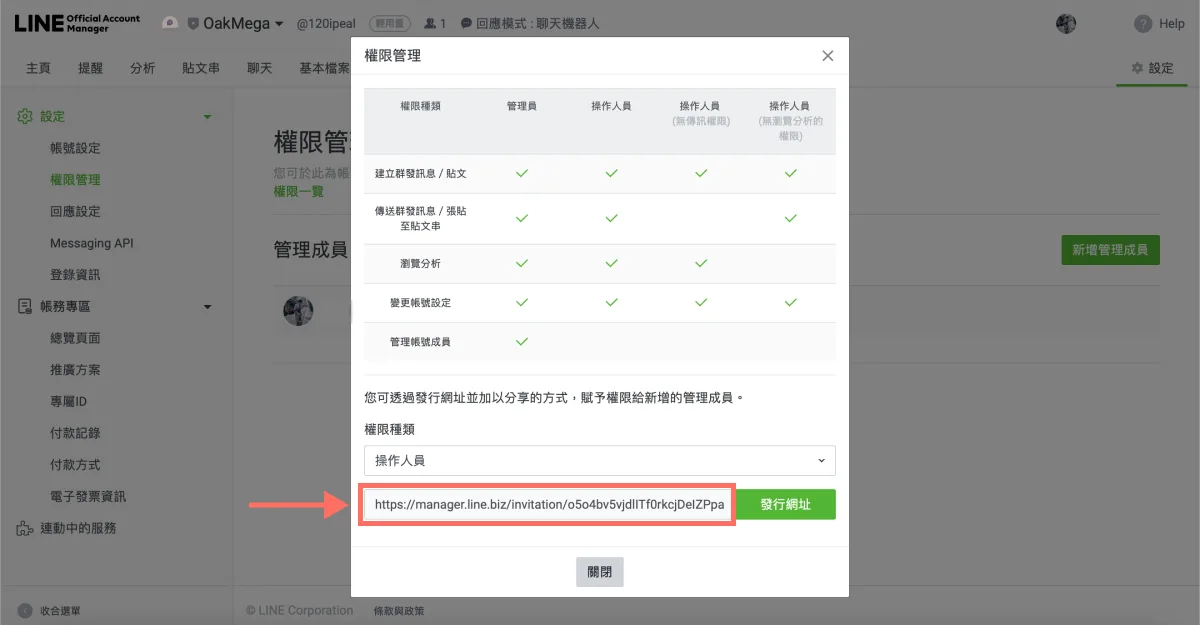
- Click “Issue URL,” and an invitation link appears on the left. Note that each URL is valid for only 24 hours after it's issued and can be used only once.
- Click the URL again to copy it, then send it to the person you're inviting so they can join as a member of your LINE Official Account.
Now that you know how to manage LINE permissions and add members, pretty simple, right? Want more tips on running your LINE account? What's the difference between the four permission levels, and can you upgrade or downgrade a member's permissions? Visit the OakMega LINE Official Account to learn more, or follow the “OakMega LINE Marketing Playbook” for step-by-step guides to building your brand's LINE Official Account from the ground up.