






Advanced LINE Guide | How to Create a LINE Login Channel in LINE Developers
Running a LINE Official Account and ready for LINE Login? Before we walk through setting it up, here’s a quick look at what LINE Login is and when to use it.
 Khan LeeCTO
Running a LINE Official Account and finding that it’s time to set up LINE Login? Before we get into the how-to, let’s take a quick look at what LINE Login is and when you’d use it.
What is LINE Login, and how does it let friends sign in with LINE?
LINE Login is one of the more advanced tools for LINE Official Accounts. It lets businesses and third-party providers retrieve LINE friends’ user data through a website (or an app). So how exactly does a website (or app) let friends sign in with LINE?
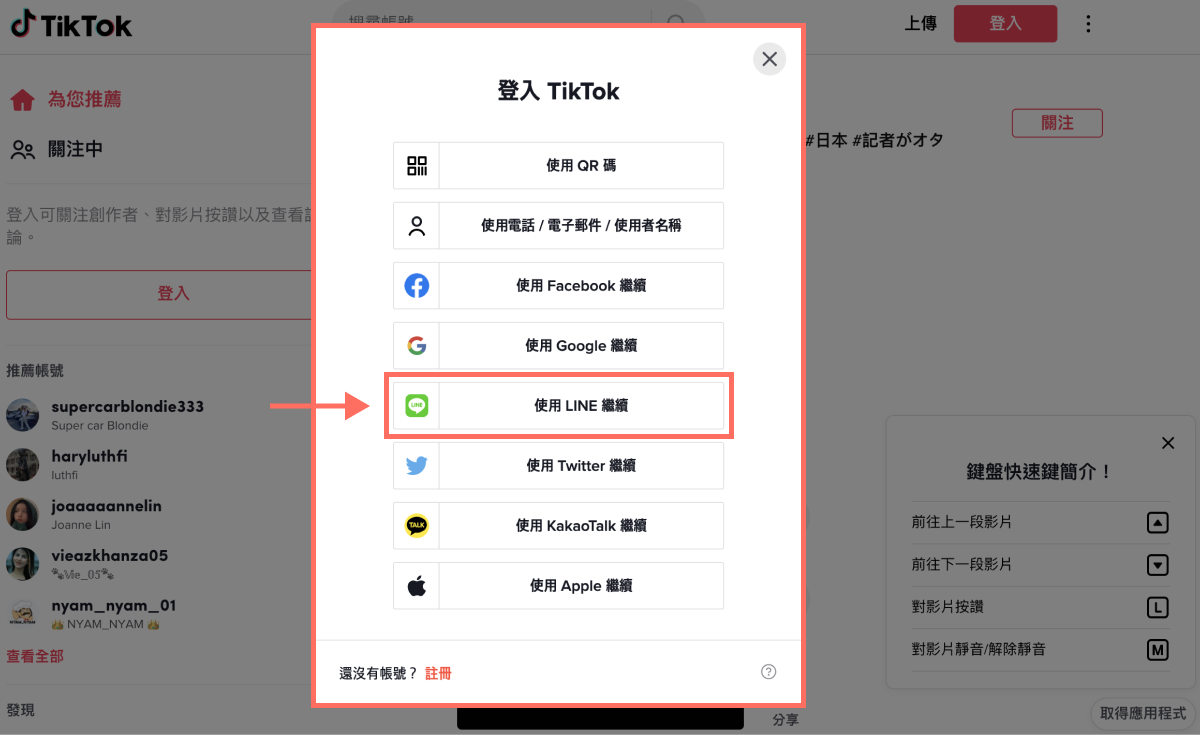
Take TikTok’s login page above as an example. The “Continue with LINE” option is something TikTok built after creating and configuring LINE Login. With it, TikTok users can sign up and log in with LINE. So if you want your own members to link their accounts, sign up, and log in quickly with their LINE accounts, LINE Login is a must-have.
Before creating LINE Login for your LINE Official Account, make sure you already have a LINE Developers account. If you don’t, start with these two tutorials:
- “How to create a Messaging API channel directly from the LINE Official Account Manager”
- “How to create a Provider in LINE Developers”
Now let’s create your first LINE Login channel!
How to create a LINE Login channel
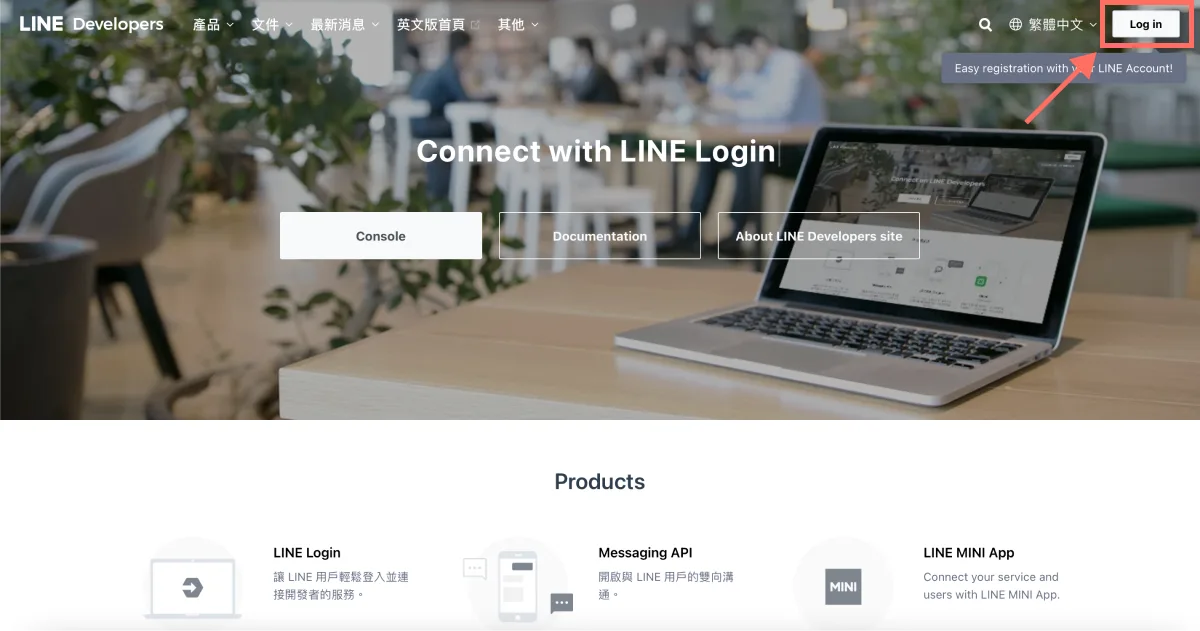
- First, click “Log in” in the top-right corner of the LINE Developers page and sign in to the LINE Developers console with your “LINE Business ID.”
Note that you don’t create it in the LINE Official Account Manager. Many people mix up these two platforms, so here’s a simple rule of thumb: go to LINE Developers for all technical settings, and to the LINE Official Account Manager for engaging with friends and running your official account.
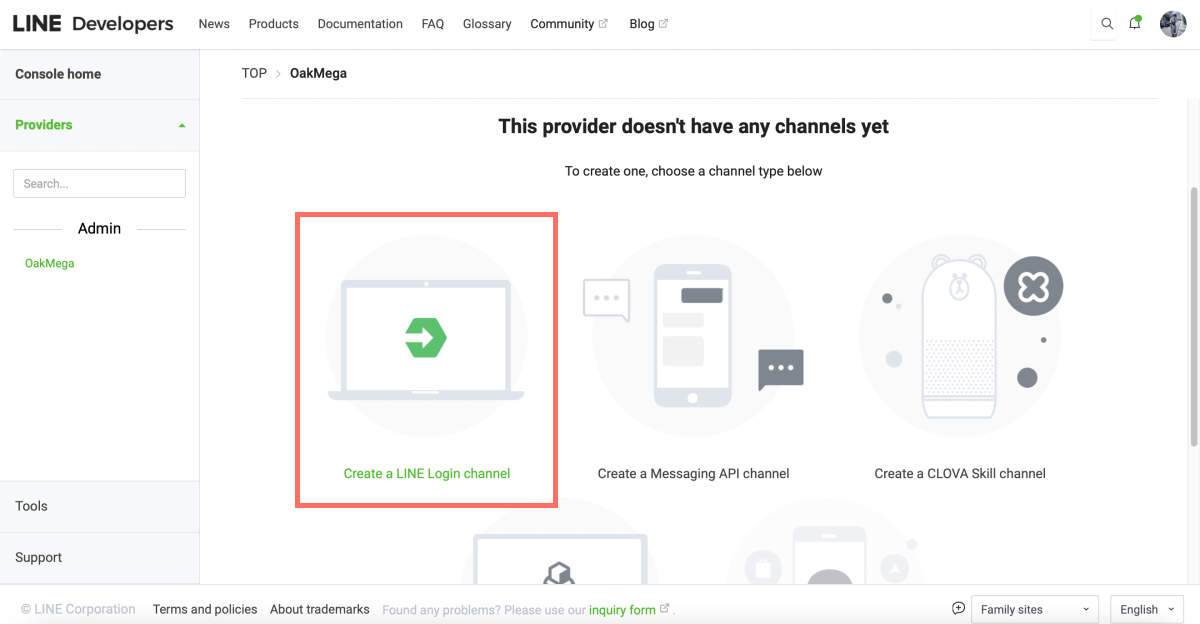
- In LINE Developers, open the relevant Provider and click “Create a LINE Login channel” to start a new LINE Login channel.
-
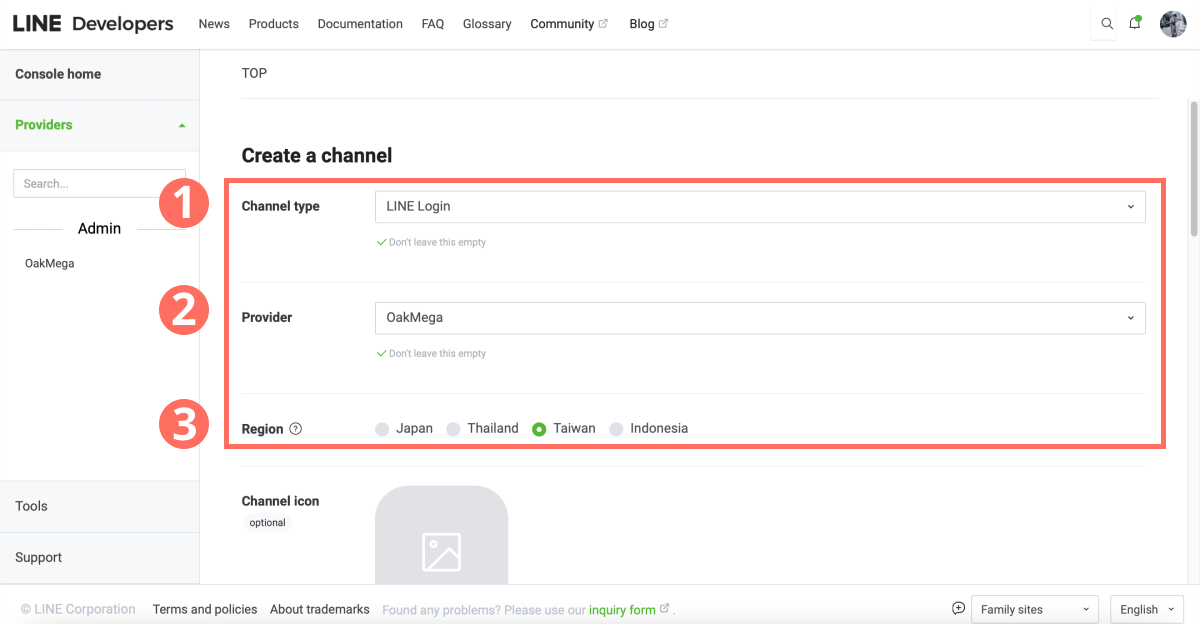
On the creation page, fill in the following in order (you can edit all of it after the channel is created):
-
Channel type: “LINE Login” is selected by default. If it’s wrong, pick “LINE Login” from the dropdown.
-
Provider: defaults to the Provider you just selected. If it’s wrong, pick the right one from the dropdown.
-
Region: defaults to “Japan.” Change it to “Taiwan” yourself.
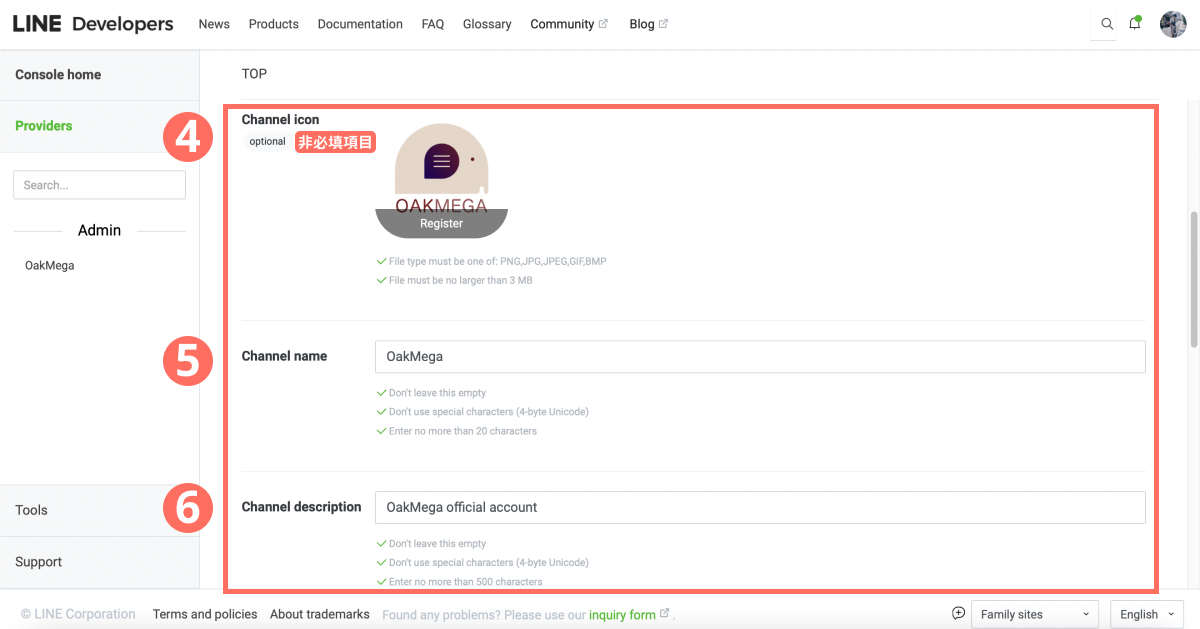
- Channel icon: optional. You can upload your brand logo as the channel icon.
- Channel name: enter your brand name (up to 20 characters).
- Channel description: enter a short introduction to your brand and services (up to 500 characters).
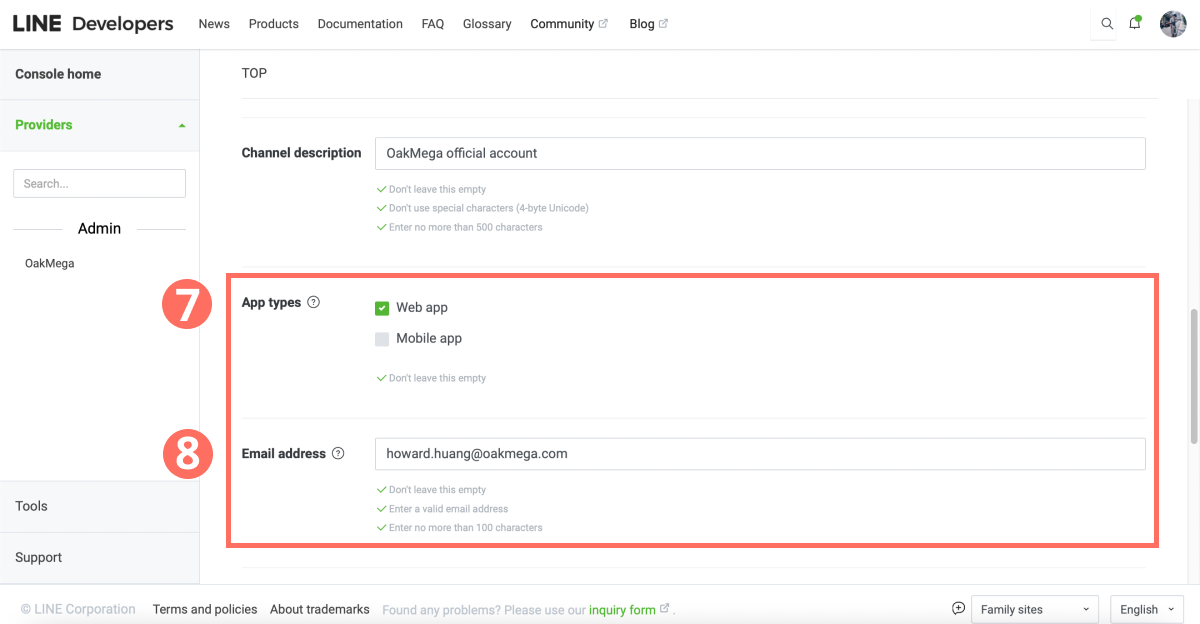
- App types: just check “Web app.”
- Email address: automatically filled in with the email you logged in with. Change it to a company address if needed.
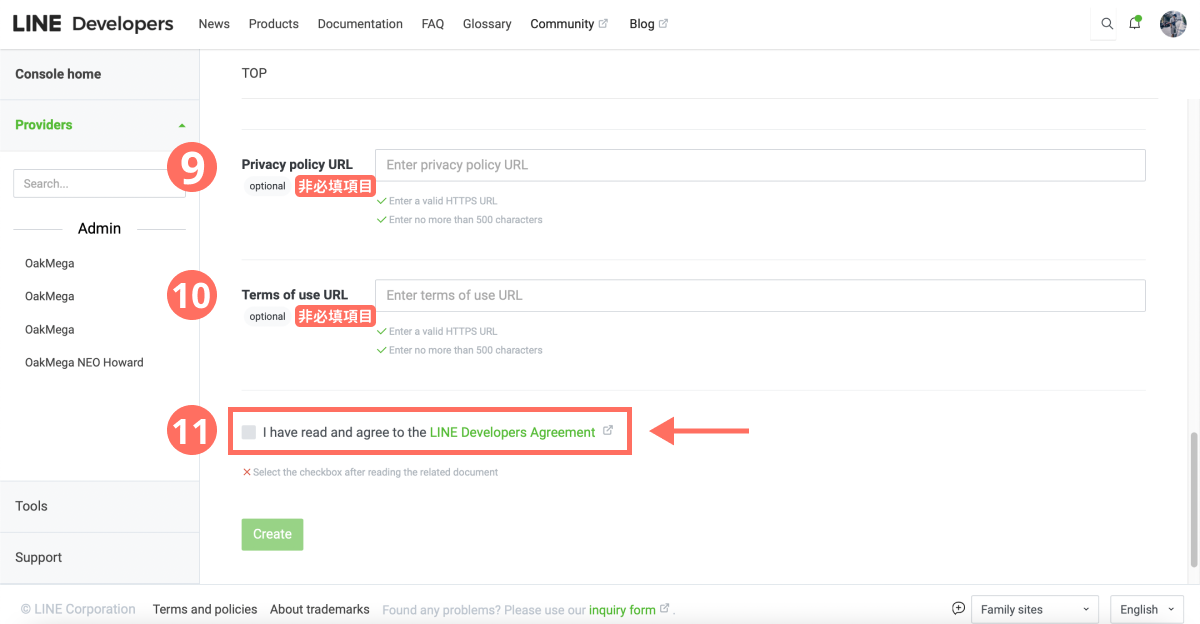
- Privacy policy URL: optional; you can leave it blank for now.
- Terms of use URL: optional; you can leave it blank for now.
- LINE Developers Agreement: check the box to accept the terms.
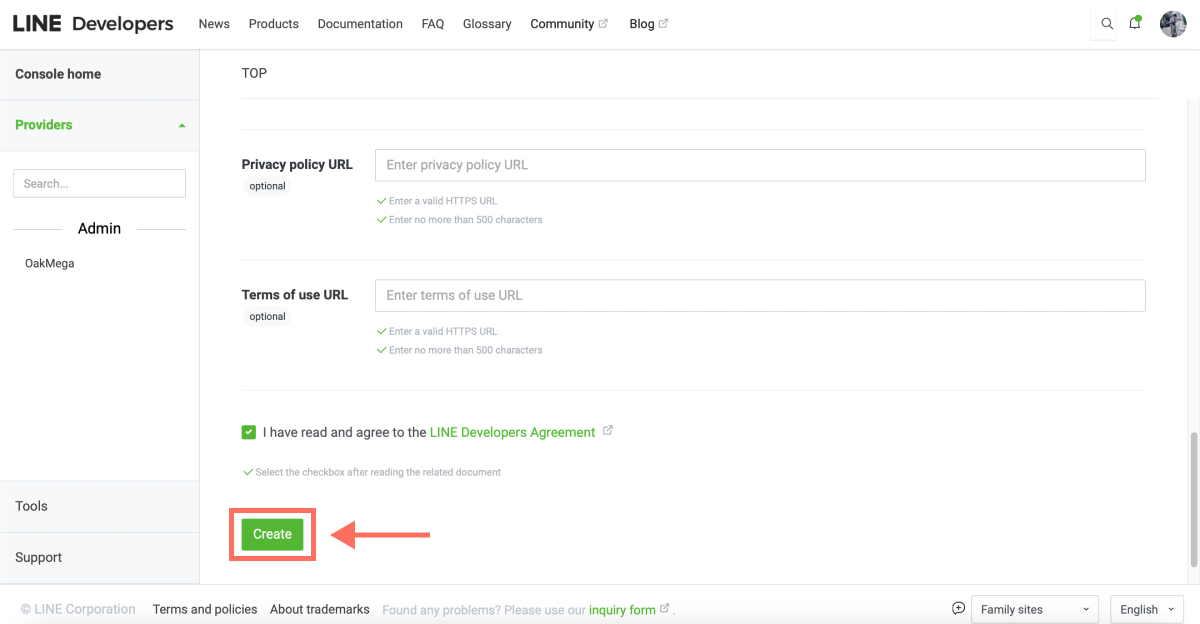
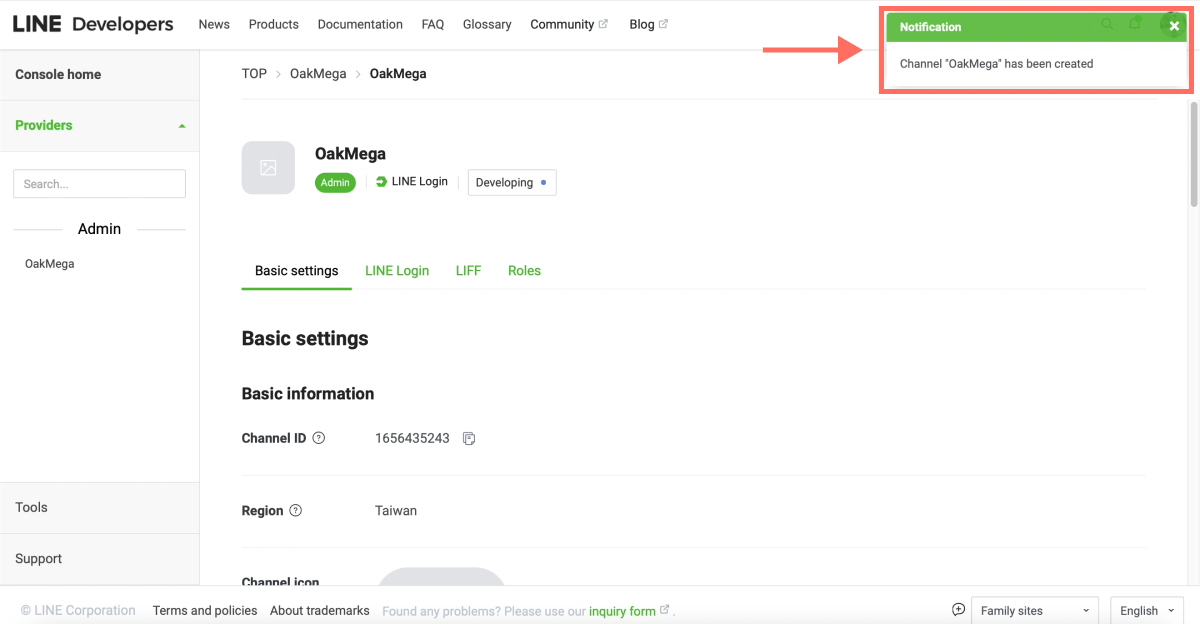
- When you’re done, click “Create.” Once the page reloads, a success message appears in the top-right corner, meaning your LINE Login channel is ready.
That was quick, wasn’t it? But what does all this channel information actually mean?
- If you’re an engineer, continue with “Getting started with LINE Login” to learn how to implement web login with LINE Login.
- If you’re not an engineer, good news: just grant your engineers access to the new LINE Login channel and let them take it from there!
One last thing: LINE Login has another very important feature, the “LIFF app,” which is unique to LINE. What can a LIFF app do for your LINE Official Account, and how do you create one? Read on: “How to create a LIFF app in LINE Developers.”
Want more tips on running LINE? Anything else you’d like to know about LINE Login? Head over to the OakMega LINE Official Account for more LINE marketing content, or follow our “OakMega LINE Marketing Toolkit,” which walks you through building your brand’s LINE Official Account from zero to one.